The Steps
parts & labor
what's needed to get the job done
basics of function
overview of how to use the lens and shutter
the back, the strap, the lens
remove useless vintage roll-film parts; lens
the rangefinder
removing, taking apart
cutter-bar & inner parts
more useless vintage parts that have to go
ready the back
cutting; fitting the packfilm back; odds n ends
acquiring a 900 finder
removal & appropriation
fitting the finder & flash
measure, drill & fit
aesthetics
remove & re-leather; paint
adding the back & flash
screws, tape & wires
putting it all together
replace rangefinder, strap, flash & side door
reset infinity
setting the focus stop
completed
admire the work
The Rangefinder
Since this two-window finder is going to be replaced by the single-window from a Model 900 I won't be going into any detail about its inner workings.
Instead, just remove it.
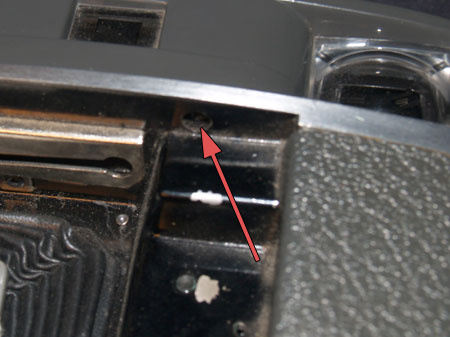
The front only has a single screw
There are two on the back.
The right side is a bit tough, you'll need a philips head screwdriver small enough to fit into the recess.
The left screw is larger than the other two, save them.
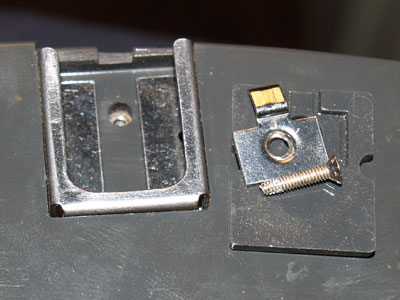
The hotshoe contains the last screw. Its wired to the lens' PC flash socket by 2 wires.
Remove the screw, metal contact and plastic spacer.
What you don't see is one of the flash wires within the finder housing held by the screw you just removed.
The other contact is soldered to the last piece by a post extending into the finder housing. Since I am going to be replacing this hotshoe, its quite alright to cut the wire. If you are going to keep the original hotshoe, refer here to see how it is wired.
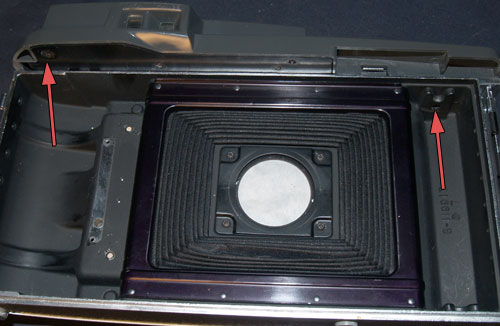
With the housing off, its time to gut what's left.
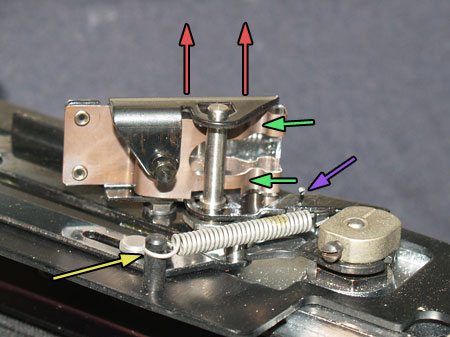
The first part to remove is the focus mirror. It is held to the post by tension from the bent copper backing. And to keep it taught, there is a bent wire, purple arrow, you need to unhook.
Push, green arrows, and pull up on the mirror to remove it.
Unhook the spring, yellow arrow, to detach the cam arm from the finder plate. There are 3 screws, red arrows, and 1 tiny bolt, blue arrow to remove the plate.
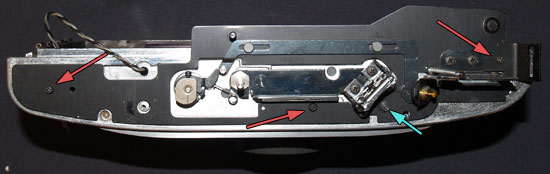
Next to go is the stationary mirror which is held down by a small bolt and the mirror post which is actually threaded into the camera body. Later, this hole will need to be enlarged to accept the Model 900 finder's mirror post.

If you are going to keep the 110a finder stock, be careful not to bend or lose the tension wire beneath the post bolt, green arrow
Loosen the focus cam screw, yellow arrow, to remove the cam and arm.
If keeping 110a finder, note the location of the cam and the arm. This is infinity focus.

With little force, pry up the pieces. How much care you take with this depends on if you will keep the 110A finder or swap for a 900.
You can not remove the actual post without breaking the focus mechanism, or a lot of headaches. Maybe I will on the next project.