The Steps
parts & labor
what's needed to get the job done
basics of function
overview of how to use the lens and shutter
the back, the strap, the lens
remove useless vintage roll-film parts; lens
the rangefinder
removing, taking apart
cutter-bar & inner parts
more useless vintage parts that have to go
ready the back
cutting; fitting the packfilm back; odds n ends
acquiring a 900 finder
removal & appropriation
fitting the finder & flash
measure, drill & fit
aesthetics
remove & re-leather; paint
adding the back & flash
screws, tape & wires
putting it all together
replace rangefinder, strap, flash & side door
reset infinity
setting the focus stop
completed
admire the work
Ready the Back
Take your packfilm back and place it onto the camera body. It doesn't fit. First, because the right side of the camera interferes with the packfilm latch. Second, because of the ridges running along the top and bottom of the camera's back.
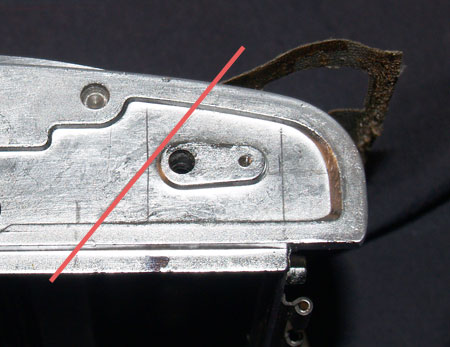
Insert a film mask from an empty pack of film into your back, this will show you where you need to align the back to center the image. For this back, a miter cut is a must. Using your measurements, find the points to mark where to cut.
Typically this is about where the edge of the cameras window is on the back, to about 1/4"or 1/2" from the front hinge. Measure twice, cut once.
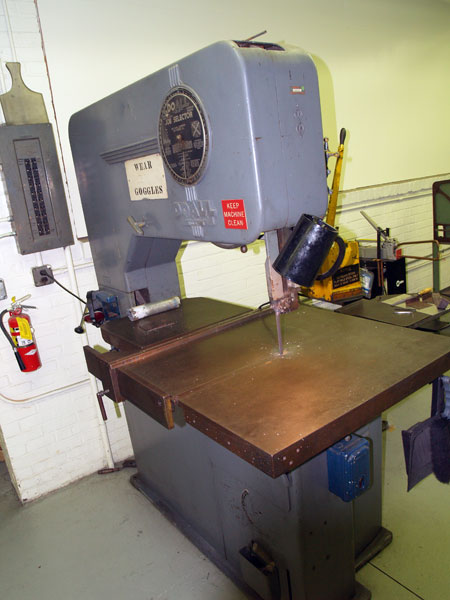
For this project, I wanted clean and straight, so luckily I found this bad boy. An industrial bandsaw that will do the cut cleanly and quickly. You can also use a Dremel or a hacksaw to do the cut.

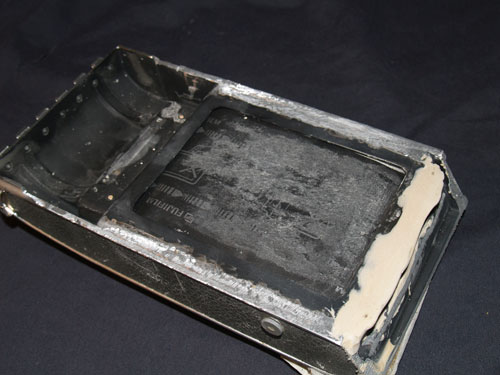
With the cut now complete, the only thing left from placing the packfilm back flush are those darn ridges and rivets from earlier.

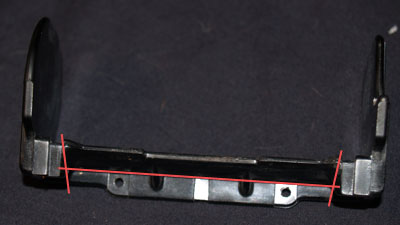
The ridges need to be cut off flush and at the same time the rivets need to be ground down. Cut the ridges off but leave some ridge on the left side.
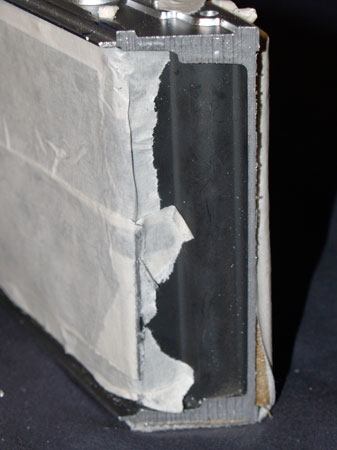
I noticed that with this particular back, the opening for the film is wider than the actual film and mask. This left a gap when there is no film in the camera.
Afraid of light leaks, I used some Bondo to add to the right side.
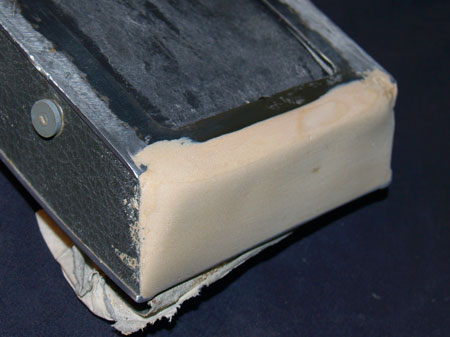
I've seen others who use aluminum plates or nothing at all to cover the miter cut. While I had the Bondo out, I filled in the right side. I felt that this would give it a seamless and smooth look. What you do with your "ugly edge" is up to you.
With the film plane flush. Test fit the packfilm back and notice it won't stay in place by itself. Originally, I used JB Weld to attach the back. This time, I will use the mounting screws that came with the back.
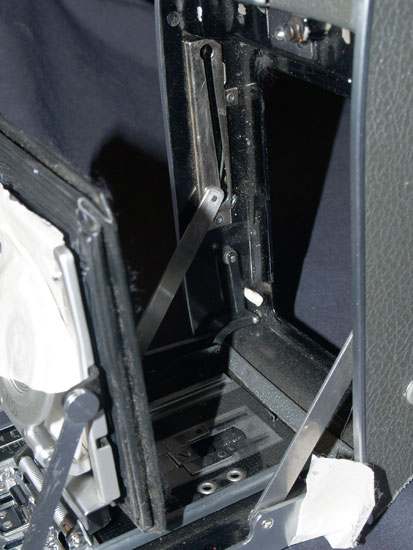
Since I am going to be drilling through the camera, now is a good time to detach the bellows from the body. Its held with a little amount of glue, some prying and it comes right off.
When drilling, prop the camera open and the bellows out of the way.
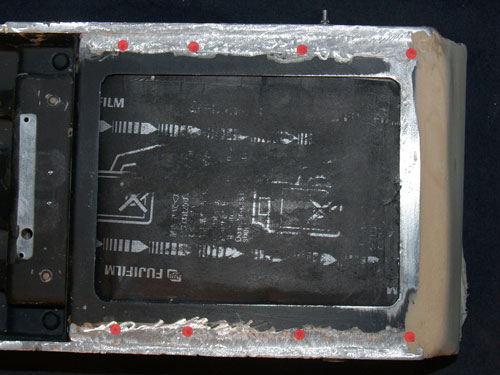
I found the best way to locate the drill holes is to place the back loaded with an empty packfilm mask onto the camera. Now, center the back over the window. Tape into place and mark the 8 holes.
I used Dremel drill bits in two passes; one small starter hole the second very close to the screw diameter. Surprisingly, the Dremel worked like buttah. While you may cringe, enough torque will force the screws into the soft metal, just don't go too large!
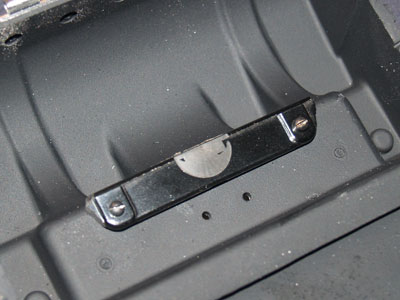
With the Dremel out, cut the leftover rollfilm spool to cover the pin and spring hole. With the camera open, insert the pin with the spring behind it. Using the original screws, replace the piece. Now the front will pop open again!