The Steps
basics of function
how does the camera usually operate; what parts do what and go where
the finder
removal, opening, cleaning
the back
assess, clean
shutter assembly
remove, open, adjust, clean
batteries
modify to accept 3v photo lithiums
completed
super sweet!
Batteries
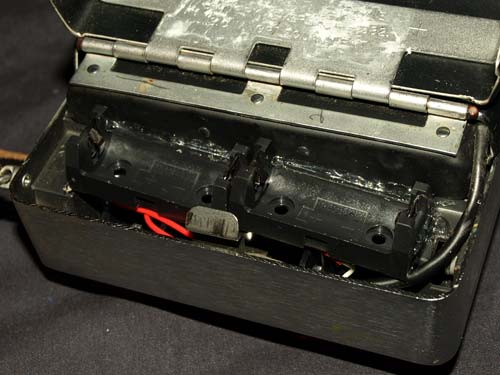
The battery compartment for these cameras is on the left side of the back. A little notch towards the top lets you know where to open from.
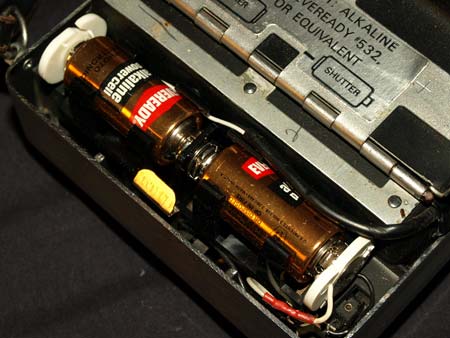
Basically these double 3v models take a really odd looking batteries with snaps (what you have on typical 9v batteries). Expect to pay $9 plus shipping if you find one. And its still going to be alkaline; less life than a lithium.
More than likely the batteries are dead, corroded, and probably both. Surprisingly this model, they looked ok.
Remove the batteries and cut the snaps off. Clean the compartment with some alcohol and swabs.
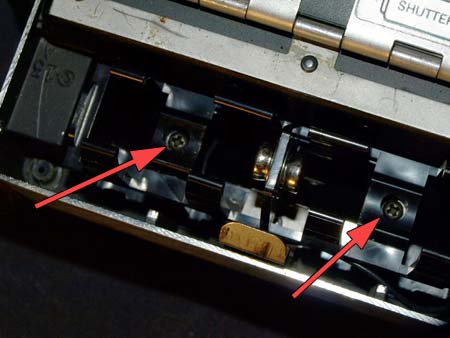
Remove the two screws holding the battery clip.
With single battery compartments you'd normally have to remove the entire plastic compartment, but with a dual battery model, you only remove the battery clip.
There are still some odd contacts and wires left. Its quite obvious which leads to the timer, but the shutter is another matter. Look inside and notice 2 wires coming from the front of the camera. These are the ones you must connect to. All other wires, regardless of their connection, should be removed.

You will notice some extra wiring and connections inside the compartment. Trace back until you find the 2 original shutter wires coming from the front of the camera. Remove everything else so you only have these 2 wires left. Just yank.
To make sure your camera will even function with a new battery, get yourself a 3v source. Be it a 2xAAA holder or a 3v lithium holder. Connect the shutter wires to it temporarily. Cock the shutter. With something covering the electric eye, push the shutter button and hold it. You should hear a single click. Wait a second or two, and remove your finger from the eye. If you hear a second click soon after, the camera is working. If you only hear 2 very fast clicks no matter what you do, the power is not reaching the circuits.
One click is the shutter opening, the second is it closing. Test different lighting situations and listen for the differences in timing. Bright light should make the clicks closer together than a dark place.
While I chose to mod this one to 3v photo lithium (CR123-size) batteries, if you feel you do not need the electronic timer, you can still use 2xAAAs.
However, there is simply not enough room to fit 4xAAA batteries in there so if you want both the timer, you only choice is to use 2x3v lithiums.
DO NOT CONNECT THE 2 BATTERIES IN SERIES! IT WILL SHORT THE CAMERA. YOU MUST USE SEPERATE 3v SOURCES FOR BOTH!
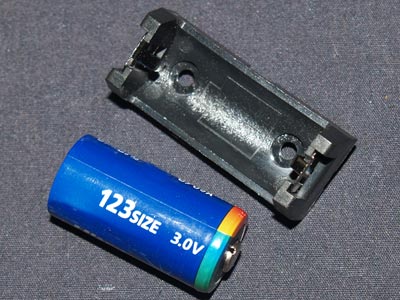
You'll find these batteries in any store that sells batteries. The holder would be a little more difficult, Google can be your friend for those. Both can be had for under $9 total and will dramatically increase the time between battery changes.
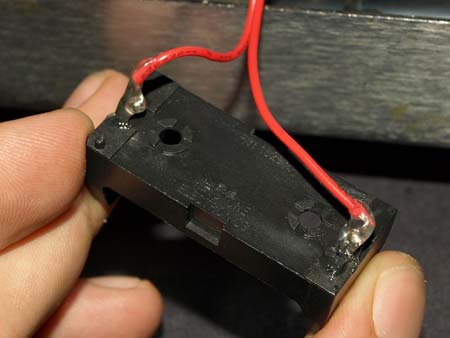
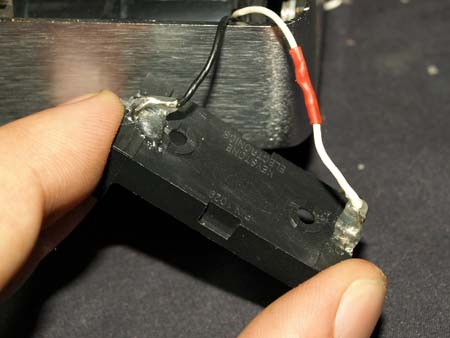
Strip the 2 wires for both the shutter and timer. I found using an xacto knife and shaving the covering to be best, the wires are flimsy. Using a soldering iron, tin the tips with some solder and flux. Do the same to the 2 terminals of the battery holders.
Solder the white wire to positive, the black wire to negative. Just for cleanliness sake, use some hot glue to seal the connections.
You may need to lengthen one set of wires to get it to reach the top of the compartment.
Turn the holders a few times to keep twist the wires together. Test fit the battery holders next to each other. They should only fit in one configuration. Make sure you can still close the door. Use more hot glue along the right side and bottom of the compartment to hold them fast. I also like to seal the side edges.