 When taking on a project whose parts can cost a pretty penny, like the 110A/B, I find it is always best to do a test run. I wanted to convert a 110A to packfilm, but decided I would start with a 150.
The 150 and 110A/B bodies are exactly the same, including all parts except for the lens/shutter. This makes working on a 150 the same as working on a 110A/B only without the heartache that can happen when you have no idea what you are doing and break stuff.
This is merely a personal documentation of what I did. I do not recommend following anything you see here.
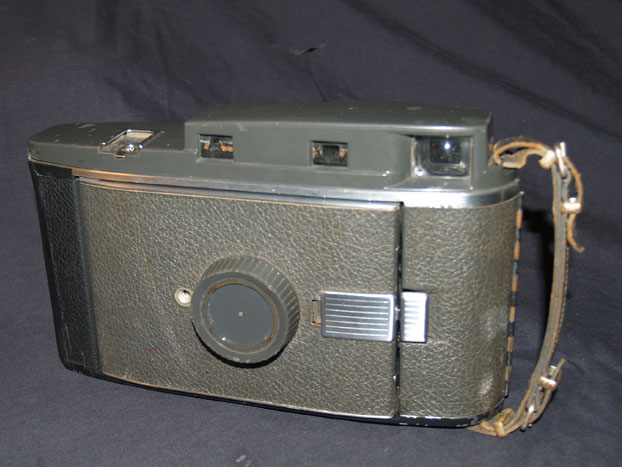
Model 150 alpha – front
I didn’t care how it looked in the end, so long as it worked. So while this is certainly not the prettiest conversion, it is functional.

Model 150 alpha – back
I used the back from an Automatic 104 spraypainted black to test how the plastic would take paint.

Model 150 alpha – back
I took a spring from the 104 and used it to hold the door closed.
I wanted to try and make the back fit to the camera, instead of simply hacking off the side of the camera and hoping for the best. I used a Dremel tool for the whole cutting process, which I do not recommend. It made the process slow going and required a lot more fittings.

Model 150 alpha – side

Model 150 alpha – side
In order to achieve a somewhat seamless look between the back and the camera body, I used some Bondo and a metal piece of the original camera back to make the right side a little more rounded.

Model 150 alpha – tab flaw
In hindsight, I should have also filled in the gap this created between the back and the newly Bondo-ed piece. Tabs can get stuck here and need a poking device to get it back. Not a big deal, but it made me realize that although its a nice idea to make it rounded and nice looking, its not fully functional.

Model 150 alpha – bottom
I also Bondo-ed the bottom and tried to round it as well. Again, this was a nice idea, but functionally, it doesn’t help.