This is a good time to point out that this particular project is dealing ONLY with a 105mm lens. Which is 9mm less than the stock lens of the 250. When choosing which of the 2 halves of the lensboard to attach your lens to, take this distance from stock into consideration.
Less than stock places the lens further back, towards the film plane. More than stock places the lens further out.
When choosing which of the 2 halves of the lensboard to attach your lens to, take this distance from stock into consideration.
Less than stock places the lens further back, towards the film plane. More than stock places the lens further out.
To figure out which will work best, I attached the lens to the bellows without the lensboard. Using a ground glass insert I tested for infinity focus. Hold the lens, attached to the bellows, in one hand and with the shutter open watch the ground glass until infinity is in focus.
I made a measurement of the distance from the film plane to where I found infinity. Re-assembling the lensboard pieces and focus arms, use this measurement to see where this focus point lies.
I found that attaching to the back board would be best for 105mm.
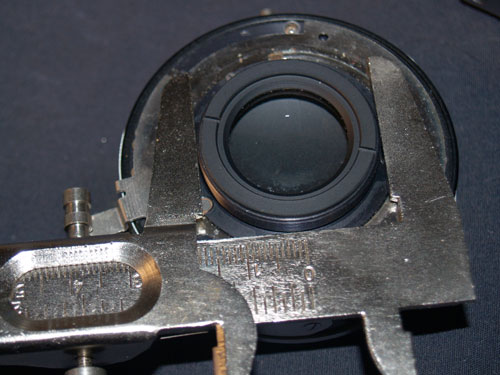
measure rear lens diameter
Time to measure the rear lens diameter.
Use this measurement to grind out the opening on the back of the lensboard.
The shutter should fit snuggly.
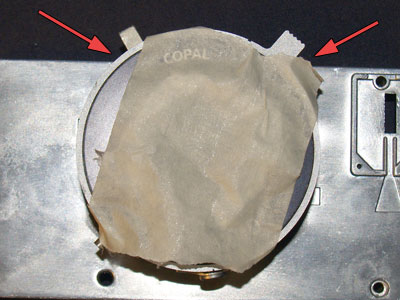
top overlap; measure for notch cut
To fit the lens, a piece of the top of the board needs to be cut off.
Putting the lens on the back you can see where it needs to be cut at a minimum to allow the controls to work.
remove lip; cable release cut
When grinding out the hole, go slowly and constantly check to see if you are not close enough or almost close enough. Too much cut and the lens will jiggle.
The cable release port is on the bottom, so I need to cut a notch too.
measure and cut
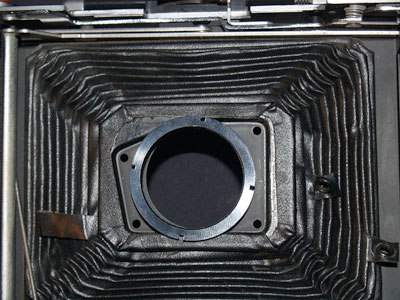
Hopefully, the lens now fits like it should into the lensboard.
If you try to attach the board with lens to the bellows, you’ll see the retaining ring is just slightly larger than the metal piece on the bellows.

ground to fit
You don’t need to grind out the lens opening, just the lip where it bumps the ring.
It may look a bit ugly, but being hidden, it only needs to work!
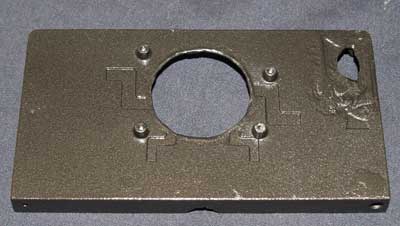
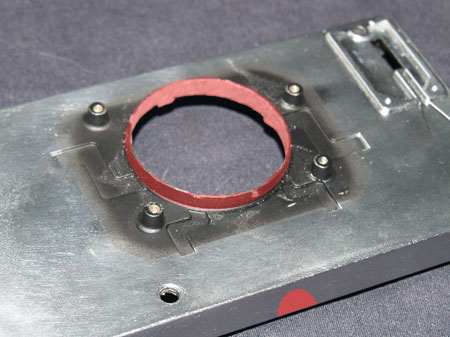
painted; hole for flash
Because I had ground so much of the lensboard I figured a layer or two of paint couldn’t hurt. If I felt like taking more time I would have used some body filler and made a nice smooth board, but who cares.
remove lip; cable release cut
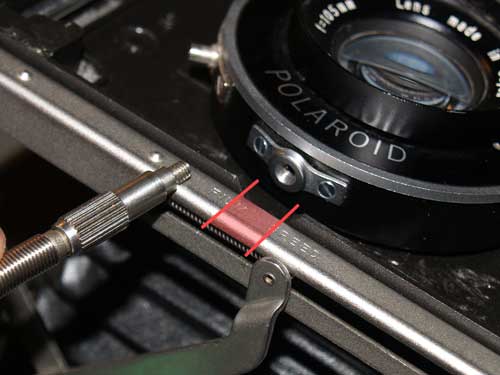
I noticed a problem I had neglected, the notch for the cable release needed to be extended into the spring loaded rail thing. Cut out the smallest amount possible.
Do not remove the edge completely or the spring loaded rail will pop out!