The Steps
parts & labor
what's needed to get the job done
basics of function
overview of how to use the lens and shutter
the back, the strap, the finder
remove useless vintage roll-film parts; finder
lensboard swap
remove both lensboard assemblies
ready the body
remove leather; cut the side
ready the back
fitting the packfilm back; odds n ends
acquiring a 900 finder
removal & appropriation
fitting the finder
cut, fill, drill & fit
reset infinity
setting focus stop & tweaking finder
finishing touches
back door, odds n ends
completed
admire the work
Reset Infinity
The first step to getting the rangefinder adjusted is to make sure that infinity according to the focus knob is actually on point.
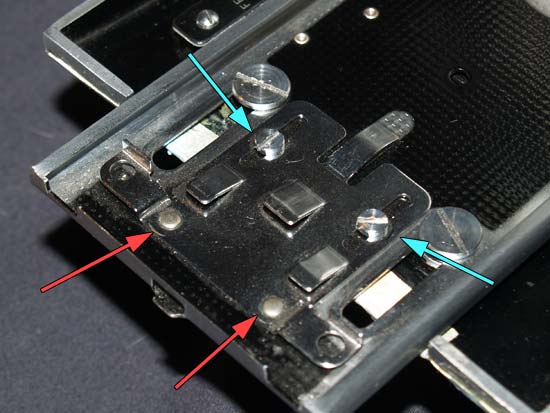
When you pull out the lensboard it locks into place. This stop is a small piece of metal held by 2 screws and 2 rivets.
Because the film plane has been moved back a few mm, this stop needs to move back as well.
Drill out the rivets and loosen the screws but don't remove them. The lensboard will snap into the stop, and with loosened screws you can slide it back and forth to find the new infinity before locking the screws down.
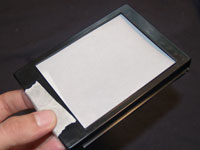
Grab yourself a tripod and some ground glass within an empty film pack. If you don't have any ground glass a piece of tracing paper taped inside will work just fine, just make sure its flat and not wavy.
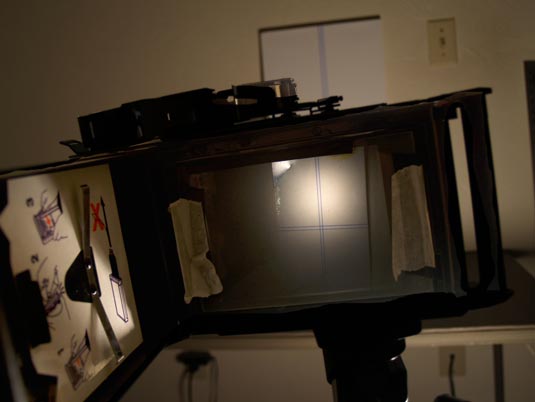
Set the camera up in a place where its darker than the thing you are focusing on. Out a window works well. Find something at least 75ft away. Make sure the lensboard is locked into the stop and that you can move the stop easily back and forth. Also, make sure the focus knob is set all the way back to infinity.
Insert your ground glass and, using a cable release to hold the shutter open at the BULB setting, move the lensboard back and forth until the object is crisply focused on the ground glass. Screw down the stop firmly.
Now that you know where infinity is, the rangefinder needs to know as well. To adjust it will take a little more work.
Now that infinity is set, we have a maximum value for the lensboard. However, that does you no good if what you see within the finder is not correct. Set the focus knob to the closest it can focus.
Find some straight lines, or draw some and hang it on the wall so that it is flat. Use your ground glass to find where the lines are in perfect focus by moving the camera back and forth, should be about 3.5 feet.
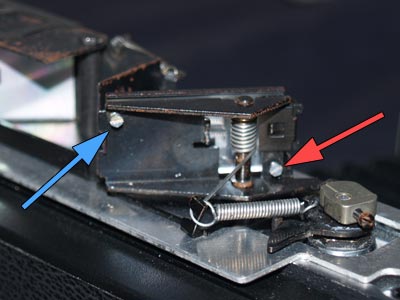
The mirror has 2 screws on it. Blue arrow is horizontal movement, red arrow is vertical movement.
While looking through the finder, turn the screws until the split-image is correct.
If for some reason you can't get it right, check to see if your mirror cam is not off somehow, the cam is basically the focusing "curve" and if its off, so will be your focusing.
In the end, as long as you never have the aperture wide open, focus should be fine. If you want 100% accuracy, test your focus on the ground glass vs the finder at different distances.