The Steps
parts & labor
what's needed to get the job done
basics of function
overview of how to use the lens and shutter
the back, the strap, the finder
remove useless vintage roll-film parts; finder
lensboard swap
remove both lensboard assemblies
ready the body
remove leather; cut the side
ready the back
fitting the packfilm back; odds n ends
acquiring a 900 finder
removal & appropriation
fitting the finder
cut, fill, drill & fit
reset infinity
setting focus stop & tweaking finder
finishing touches
back door, odds n ends
completed
admire the work
Lensboard Swap
Because the bellows of my 110A were so dirty, and the 160 so clean, I figured I should keep the 160 and simply swap the bellows plates. If you have the opposite, where the 110A bellows are worth saving, you can unclip the bellows from the camera body by prying up the tabs of the metal mask along the 4 edges.
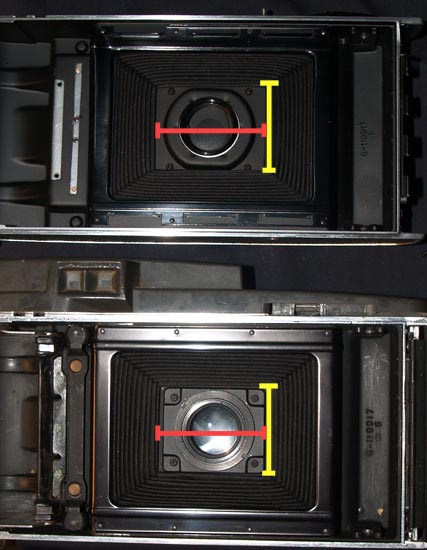
The 160 and the 110A bellows attachment is the same size, but not the same shape.
The 160 must be removed, and the 110A put in its place.
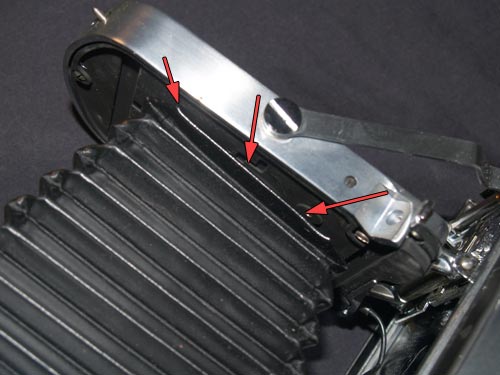
The 160 is held by 4 screws you can see here.
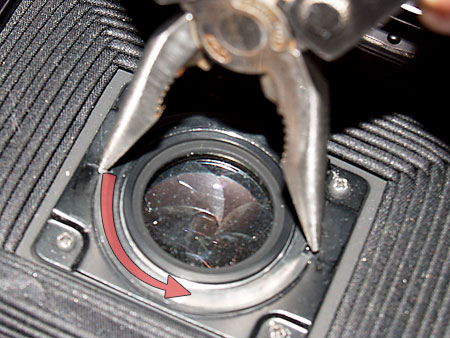
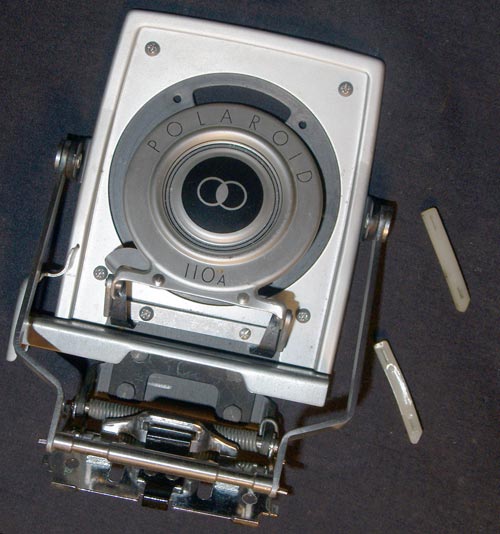
The 110A, also has 4 screws. In addition the lens is held by a retaining ring. Carefully unscrew the ring without scratching the lens, DO NOT remove it completely.
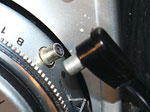
Open the front of the camera. Disconnect the flash cord.
Now the lens is held in place by the lens cap and retaining ring.
While holding the lens with one hand, finish removing the retaining ring.
Do not tilt the lens, pull it straight out or it may get stuck.
Keep the ring and lens together and in a safe place. While you're at it, give the lens a good cleaning.
If the bellows did not detach from the 160 and/or 110A lensboards when you removed the 4 screws, pry a little along the edges, should come right off.
Since the 110A is being trashed, I didn't care about the bellows condition as I removed it.
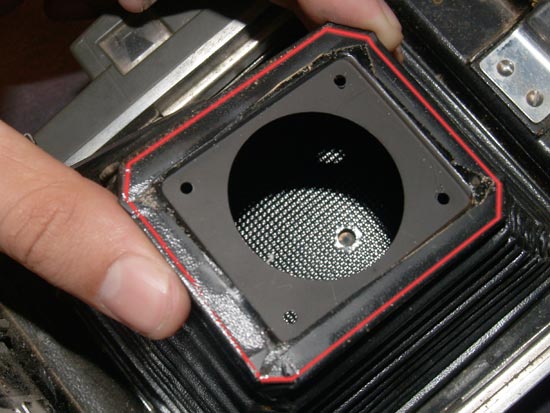
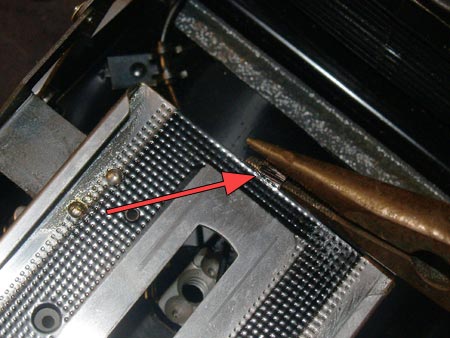
When removing the plate from the bellows you are keeping, carefully pry not just the black outer covering, but the inner glued down backing. Do one side at a time and go slowly.
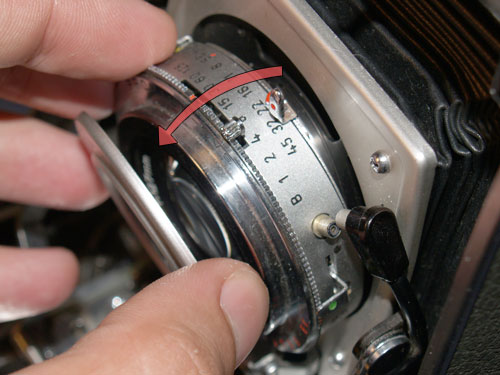
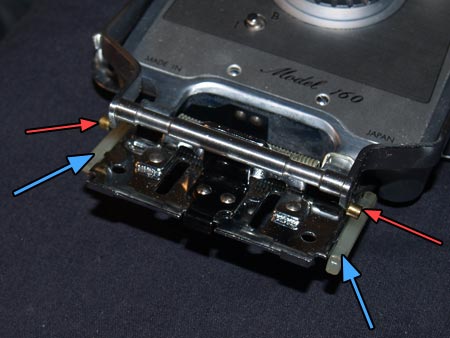
Remove the 110A lensboard by first snipping the flash cord then bending the stop tab in back, red arrow, and pulling it back while the focus rails are all the way out.
Since I am going to releather the body it is best to remove all the focus rail parts. This will make it easier to remove the 160 lensboard and peel off the leather.
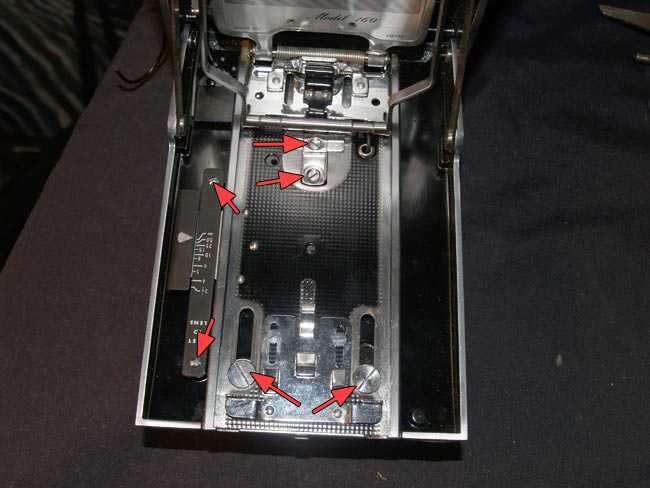
Remove all 6 screws from the 160. Be careful about the washers contained under the larger 2 front screws and the 2 semi circle plastic washers underneath the 2 smaller screws in the back.
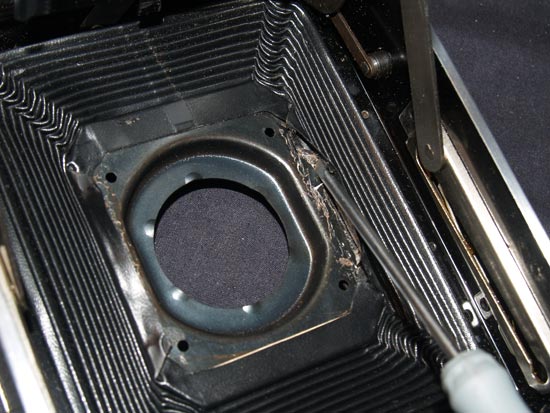
Bend the stop tab down and you can now easily remove the 160 lensboard.
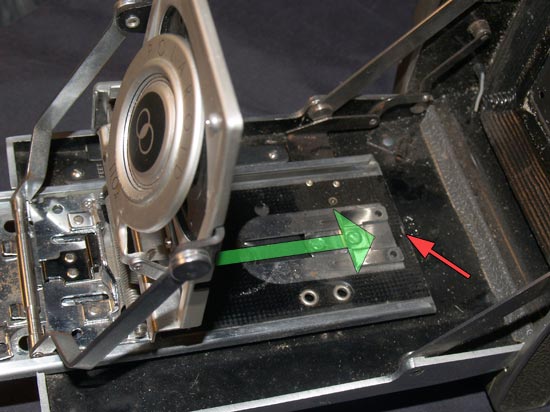
If your lensboard assembly did not track smoothly along the focus rails, these plastic pieces you see are to blame. The 110A had one crooked and certainly in rough shape. The spring arms of the assembly also had 2 small plastic tips which held them into the focus rail tracks. They too were worn.
Luckily, the 160's assembly parts are a good exchange if yours are worn as well.
Working backwards, attach the 110A bellows plate to the 160 bellows, Super Glue works great. Replace the 110A lensboard assembly to the 160 by sliding it into the rails and bending the stop back up. Attach the 4 screws to the lensboard from behind the bellows.
Replace the lens and retaining ring now, if you wish.
You've successfully swapped the 160 lensboard for a 110A.
If you are replacing the leather, its best to keep everything removed because some of the leather needs to be glued under the focus rails.