The Steps
parts & labor
what's needed to get the job done
basics of function
how does the camera usually operate; what parts do what and go where
the lensboard
removal, gutting & measuring
fitting the lens
cutting, sizing; infinity focus
release
adding a cable release
the unfortunate end
reset infinity; I broke it
The Unfortunate End
Sadly, this project has ended abruptly. As I was adjusting the infinity, I could not get it right. I think I may have bent one of the strut arms during the project. The following are the last steps I documented before throwing in the towel.
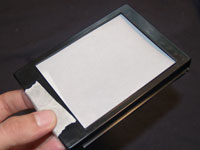
To adjust infinity focus and make the film plane focus at both extremes of the lens extension, you'll need some ground glass. If you don't have any, a piece of tracing paper will work fine, you'll just need a hood to block outside light while you focus.

Use the B setting of the lens to keep the shutter open, and set the aperture to wide open. The image will be upside down reversed, that's optics for you.
Hopefully when you decided where to place your lens, taking the focal length into consideration, infinity focus will be exact. If it is not, you can adjust it by tweaking the back and forth focus arms, adding shims to the lensboard, and possibly a few other tactics. Mine was fine as it was.
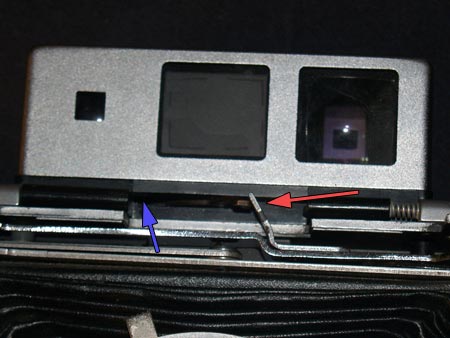
With infinity locked in and tested on the ground glass, you can adjust infinity of the finder. With a little bending, red arrow, you can probably get the focus to line up. You may need to remove a little of the plastic, blue arrow. It will never be perfect, but stopping down the aperture should solve that problem.
This is where the camera broke. I tried to bend it where I shouldn't have bent it, and it cracked. So I have no more camera to document.
Learn from your mistakes!