The Steps
parts & labor
what's needed to get the job done
basics of function
how does the camera usually operate; what parts do what and go where
bellows & lensboard
removal, gutting & measuring
fitting the lens
cutting, sizing, sealing
the timer
rewire for 3v lithium
does it focus?
test focusing
completed
in all its glory
Basics of Function
First thing is to remove the front cover. Press on the sides of the clasp and pull up to remove.
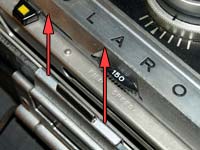
You can see the film speed dial here as well.
This camera is extremely easy to use. Like all Automatic models, it has its 4 main parts marked with numbers. Though, I don't agree with re-cocking the shutter after you take a photo.
Though not marked with a number, the first thing to do is to fold up the finder. It is on a hinge that locks in place with a magnet on the body.
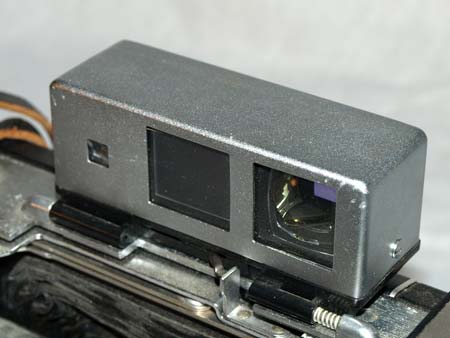
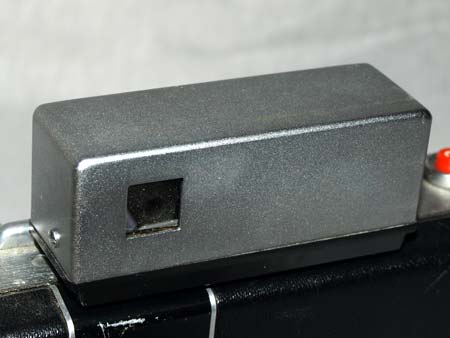
A very odd thing about the Zeiss finder is that there are 2 versions of the finder. Both are made by Zeiss and differ only in the size of the peephole. I prefer the larger one, and for this project, I am using one. Only the automatic 250 has the larger window.
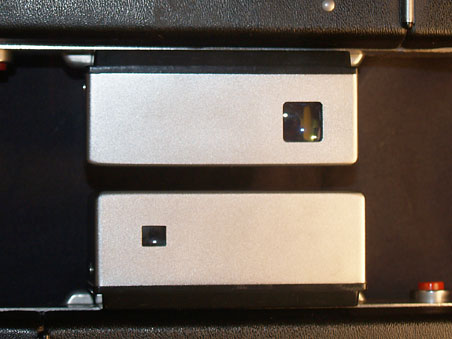
It is entirely possible to unscrew the outer metal casing of the finder, and cut out a larger eyepiece. The inside didn't change, just this outer shell.
I swapped mine to the 450 from a 250 I had lying around.
The Land List has some notes on this difference.
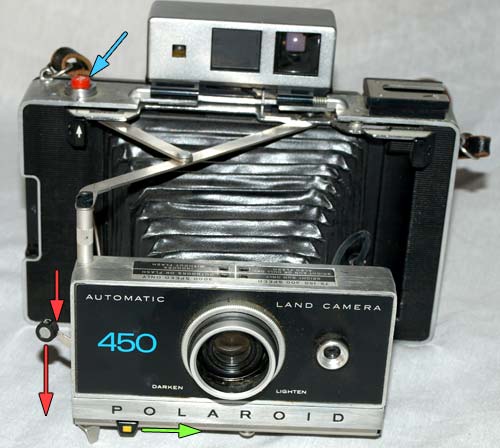
Marked #1, you pull the black tab up and the camera should spring open extending the bellows. Pull them out until it locks.
To take a picture you need to correctly set the exposure controls.
On the front of the camera are the film controls. Which is as manual as this camera gets. You set film speed at the bottom. Turning the ring around the lens will change the exposure. The little lens is the meter, electric-eye.
Going back to #1, pull the black tabs to the side. This moves the lens back and forth, at the same time a small arm actuates the finder creating the split-image focus and the parallax correcting frame.
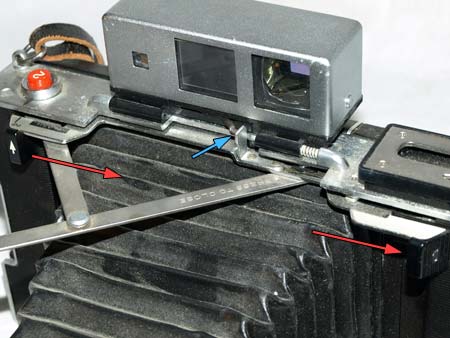
Pulling the tabs to one side brings the lens forward and allows you to focus up close.
The finder changes to reflect the lens movement with a small arm attached to the struts, blue arrow.
Marked #3, is the shutter cocking arm. Polaroid suggests cocking the shutter AFTER you take a picture, so as to have the camera ready at a moments notice. But like any good photographer, you know a cocked shutter is not a good way to keep a camera at rest.
Use the scene selector, green arrow, to compensate exposure for different lighting situations. The scene selected is shown on top of the shutter housing.
Fire the shutter after focusing, blue arrow, to take your picture. However, right now, without battery power, this does nothing.
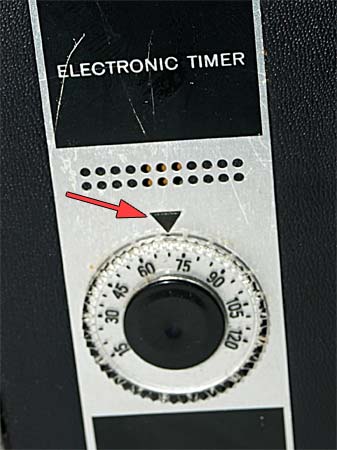
This model has an electronic development timer, which is tripped when film is pulled through the rollers. Turn the dial to set the appropriate time before pulling the film.
When activated the small triangle lights up, and BEEPS when done.