The Steps
parts & labor
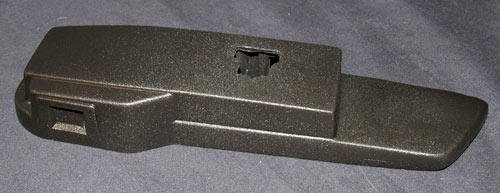
what's needed to get the job done
basics of function
overview of how to use the lens and shutter
the back, the strap, the lens
remove useless vintage roll-film parts; lens
the rangefinder
removing, taking apart
cutter-bar & inner parts
more useless vintage parts that have to go
ready the back
cutting; fitting the packfilm back; odds n ends
acquiring a 900 finder
removal & appropriation
fitting the finder & flash
measure, drill & fit
aesthetics
remove & re-leather; paint
adding the back & flash
screws, tape & wires
putting it all together
replace rangefinder, strap, flash & side door
reset infinity
setting the focus stop
completed
admire the work
Fitting the Finder & Flash
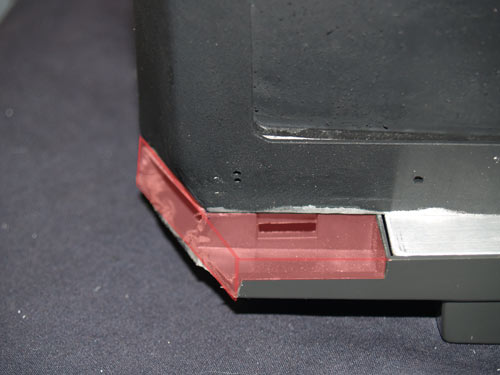
To get the finder to fit to the 110A, spots need to be ground and numerous holes must be drilled.
Tape the plate and housing together. Place them onto the camera, mark and cut. Rough edges will be fixed later.
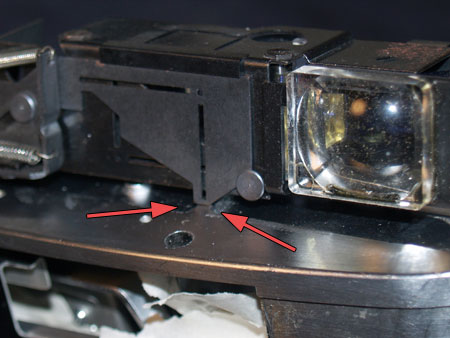
If you place the mirror box onto the camera body, you will notice that when you push the springed lever, the mask gets stuck on a lip. Grind this lip flush.
Place the plate onto the camera. Notice that only one hole lines up with the body, red arrow. To secure the plate, drill two new holes, green arrows, the second hole is because I will not be using the flash screw, purple arrow.
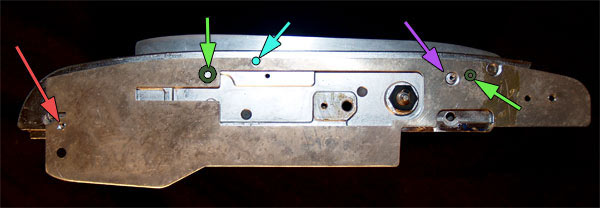
Because of the missing side of the camera and that I am not using the flash screw, the plastic housing only has one point of contact to hold it secure.
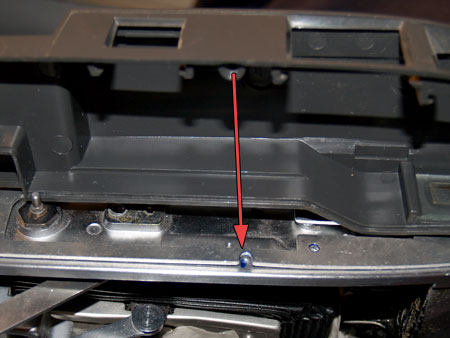
Originally the front screw access hole was slightly to the right. Drill an access hole where this notch is, blue arrow above.
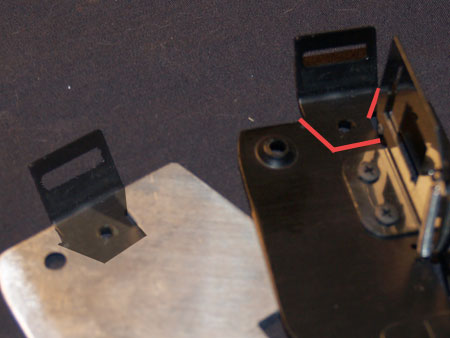
You may have noticed that the 900 lacks the wrist strap part found on the 110A finder plate. To remedy this, hack the piece from the original plate. It will be held in place by the screw that already goes here.
Now you will definitely notice that the plastic housing lacks a place for this piece to come out. To make it easier I flattened the piece with a hammer.

I cut my notch and lightly sanded it round. I also check with the leather strap for enough clearance. In the end, you can bend the piece up or down depending.
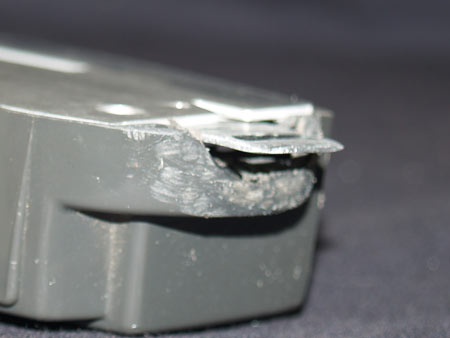
The most important part of this fitting is to enlarge the mirror post hole. The 110A's original mirror post screw is too small and short to accommodate the 900's. To fix this, you must have a drill press and a threading tap for creating a larger screw hole to accept the 900's post. Without a drill press, you can not be sure your threads are properly aligned. If you don't have access to a press, I do not recommend this part of the conversion.
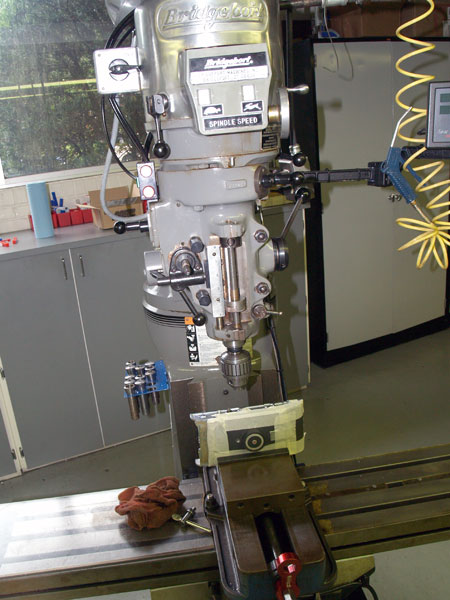
Luckily, I had been granted access to a large materials lab filled with fancy toys, like this bad boy.
You don't need something so fancy, just something that allows for a slow speed. And, of course, a vice is a must for this.
These photos show the camera has not been cut, as I had not done that yet when I was using the press.
To enlarge a threaded hole, you must know the size of the screw. In this case the hole needs to be enlarged to 10/32" (also known as a #2 BA).
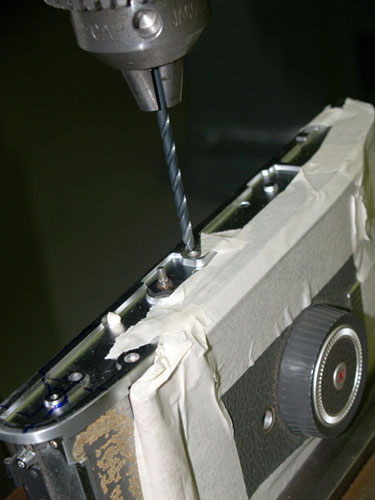
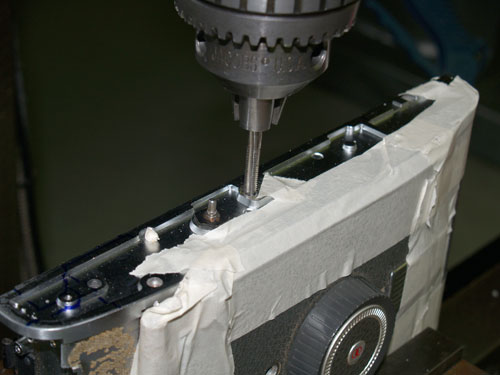
First, find a 10/32" straight flute tap. Using the slower settings of the press, enlarge the hole with a slightly smaller drill bit. Switch bits to the flute tap and drill the threads very slowly with some lubricating oil, backing out even slower.
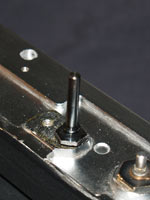
Test your new mirror post hole, should be smooth as buttah. If it is not, uhoh, something went terribly wrong.
Fortunately, I had some good help, thanks Mike B.
I've said numerous times that I won't be using the flash screw. The reason follows.
One thing that bothers me about these models is the location of the proprietary and oversized hotshoe. A solution would be to just fill in the hotshoe with some Bondo and be done with it. But without any kind of flash, taking photos would be a little less en-"lightening".
I found this PC to hotshoe adapter on eBay, there are many different styles.
With it I can connect any electronic flash and have perfect X-sync to the shutter.
Now just comes the problem of fitting it to the camera.
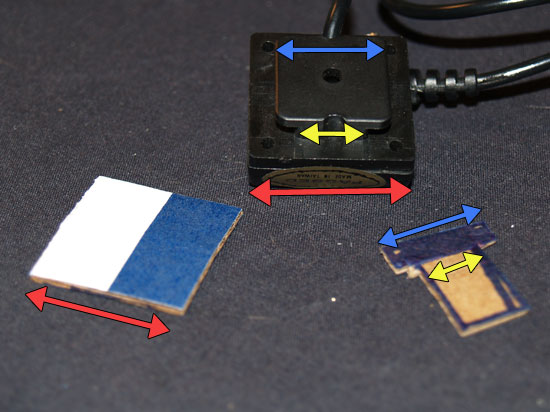
I took measurements of the hotshoe. As you can see, the square is the hotshoe area that will be covered. The smaller T-shape is the actual hole to be cut. It has a wide notch to fit the hotshoe foot, blue, and a long slot to accept the hotshoe waist, yellow.
With the shape of the cut prepared, I measured for the centerline of the housing. Then using the cardboard, I marked where to cut. It doesn't have to be exact, anything within the outer square will be hidden.
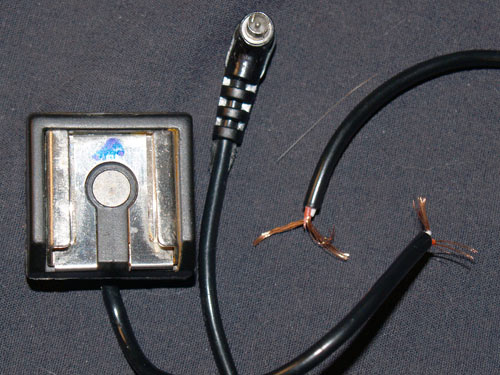
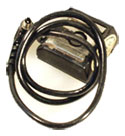
The PC adapter end will not fit thru the small hole in the camera body originally used. Cut the cord and strip the wires. The original flash wires were very thin. I'll need to find some thin wire to lengthen the cord.
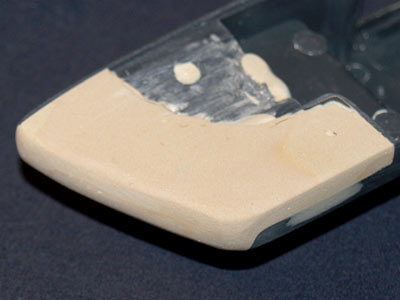
Test fit the hotshoe and make any adjustments. It should slip in and lock into place. If you really made a mistake, the next part can fix those errors. Let's break out the body filler.
Ignore the fact this photo already has filler!
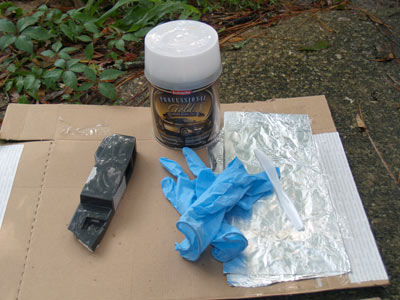
Body filler, typically known by the brand name Bondo, consists of some goop and a tube of hardener. Mixed together they make a sand/paintable surface. Work only outside and follow all the instructions from the filler. If you haven't used this stuff before, test it out first on something scrap.
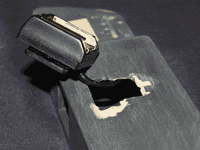
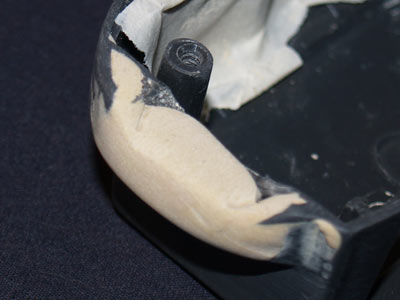
Not only do I want to fill in the hotshoe and rough mitered edge, but also that space in the back that used to fit the cutter bar.
This will give it a nice clean and smooth look.
Lay on the filler, wait for it to harden and sand to smooth. I used three applications to get it where I wanted, sanding in between each application and adding filler where needed. I highly recommend wearing a mask and goggles when sanding, its really dusty.
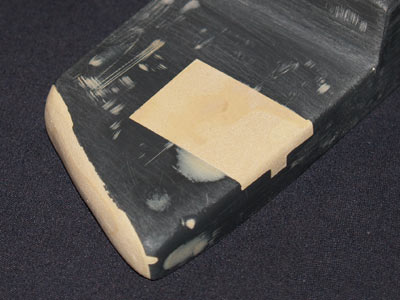
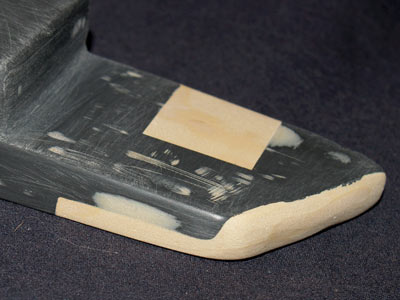
When you think everything is flush and smooth, keep going. When paint hits the surface any imperfection will stand out. It's a personal preference how you would like your edge to be.
Test fit the finder plate and make sure it sits flush. Remove material as needed. Also keep in mind of the flash wires that will be going through the already cramped housing. Remove more material where the original hotshoe went to make room.
With the finder housing all nice n shiny, the rest of the camera is looking kind of bland. I think it is time to spice things up a bit!
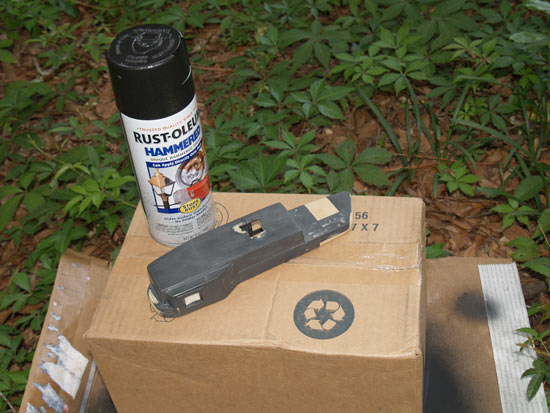
I chose a black hammered-look spraypaint. I raised the piece on a box to allow me to rotate and spray it completely.
Three coats later and I was somewhat pleased with the results.