The Steps
parts & labor
what's needed to get the job done
basics of function
how does the camera usually operate; what parts do what and go where
the back, the strap, the flash
taking off useless vintage roll-film parts
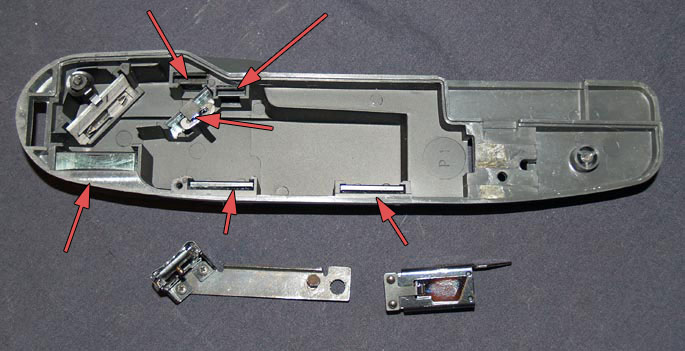
the rangefinder
removing, taking apart and cleaning
cutter-bar & inner parts
more useless vintage parts that have to go
ready the donor
removal of all nonessential parts from a packfilm donor
hack to pieces
make the back fit
odds n' ends
tidying up; side door
putting it all together
replace rangefinder, fix flash; paint
reset infinity
setting the focus stop
Putting It All Together
The rangefinder's various mirrors and glass were quite dirty. Time to give em a good cleaning. Don't forget the pieces removed earlier that aren't within the housing. The largest piece, is not easily removed, just ignore it for now.
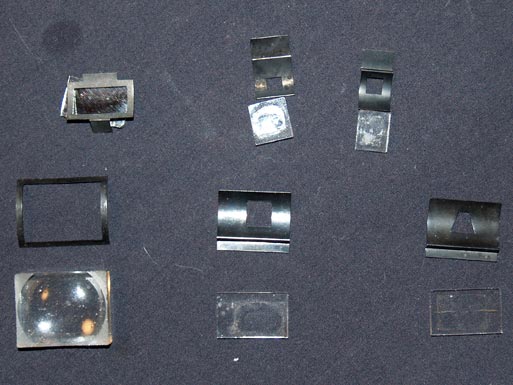
Each piece is held in place with a metal tension clip. Keep them together and you will have a nice pile like this.
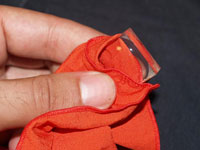
I used some Q-Tips, rubbing alcohol, and, to finish, a lens cloth to get the glass back to that factory shine.
Set everything aside for now, it's gonna get dirty again.
I could have chosen to cut the rangefinder while I was cutting the right side of the camera. But, this way leaves room for getting the rangefinder to fit a little more exact. Its a personal choice. I'd like to have a slight overlap from the cut body.
Tape both the rangefinder plastic housing and metal bottom plate together, so when you cut one, it cuts both. Mark where the cut should be, I used more tape.
Bust out the hacksaw or Dremel, go to town.
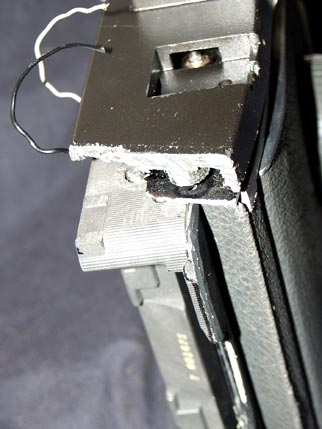
It should now look a bit like this. Use this time to make sure you like how it sits. You may want to trim the metal plate back more than the plastic, so that it sits underneath.
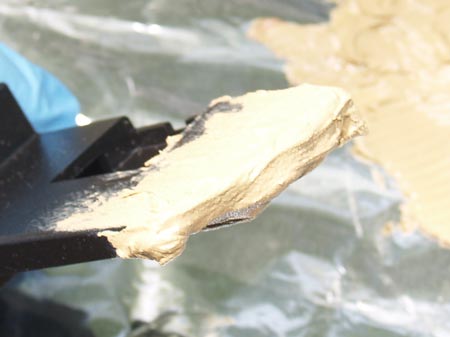
That edge is kind of rough, lets move onto the 2nd stinkiest product of the project, body filler, known typically by the brand name Bondo.

Definitely work outside when using this stuff, seriously.
Its basically a goopy liquid with a tiny tube of hardening cream included.
Read the instructions for how to mix properly. Use gloves, and find something to mix and apply with, I used a plastic knife.
If you have never used body filler before, do a couple of tests before trying it on the rangefinder. The basic idea is to build up areas, and then sand them down with varying grits of sandpaper.
This can become quite time consuming for the perfectionist. Take your time and the results can be amazing. Trust me.
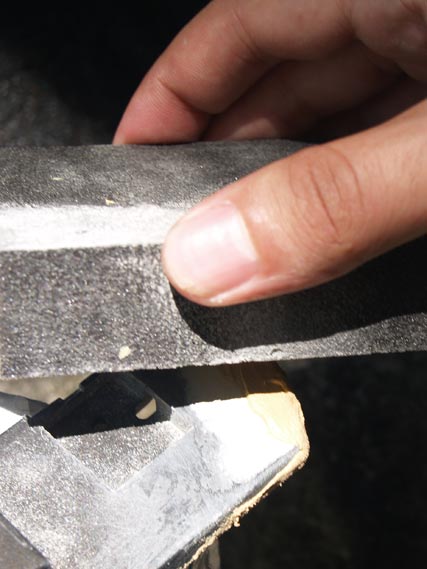
Make sure the edge is 100% smooth and seamless. When you apply paint, any little error will show up vividly. Do not feel bad about applying more than one layer of Bondo and sanding inbetween coats to get the edge how you'd like it. When sanding, use some sort of breathing mask, the dust flies.
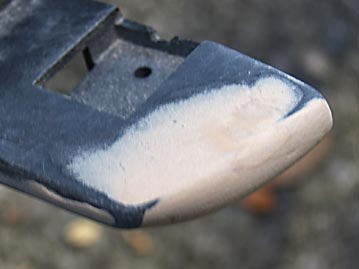
Now its ready for paint.
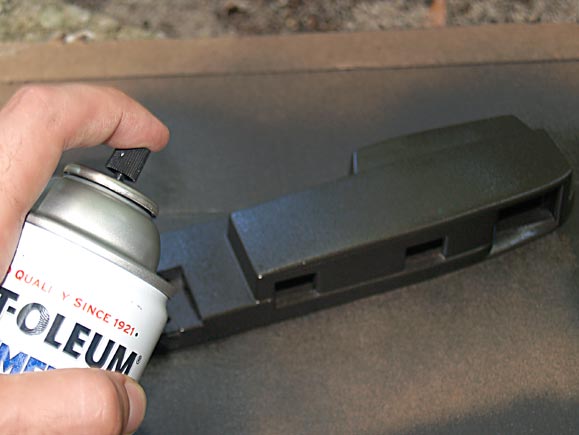
Personally, I'd like the camera to be a little strange unique in terms of its appearance. The easiest way to achieve this is with some good ol' fashion paint'n! Or, if you were so inclined, you could remove all the original leather and use another skin.
Spraypaint is cheap, and if you get the right kind, can literally fuse with plastic. The exposed metal design of the camera, will not hold spraypaint well. Try as you might, it will scratch and flake. The best you can do is spraypaint the leather, which takes it nicely.
I'm not going to tell you how to spraypaint, now is not the time to learn.
If you left the large mirror inside the rangefinder, mask it off to keep it clean.
Once dried and sufficiently less-stinky, replace all of the mirrors and tension pieces.
To replace the rangefinder, begin with the base plate. There were 4 screws to replace, but that hole is now gone. Three is plenty strong. Don't mistake the right side hotshoe screw hole for a plate screw.
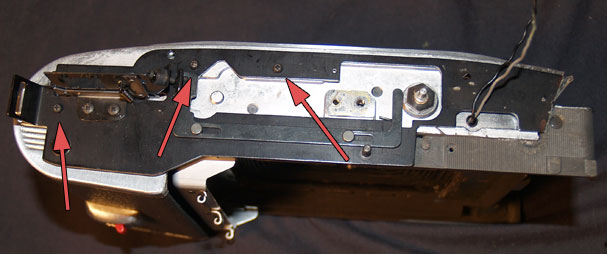
Replace the mirror with the tiny bolt. Once placed, insert the mirror post taking care to also replace the tension wire. Once the post is halfway in, put the wire in place and tighten. Also, if you removed it earlier, replace the cam and arm. Refer back to earlier photos to know how it should be placed.
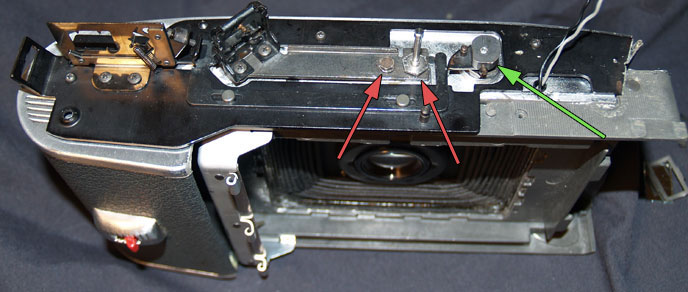
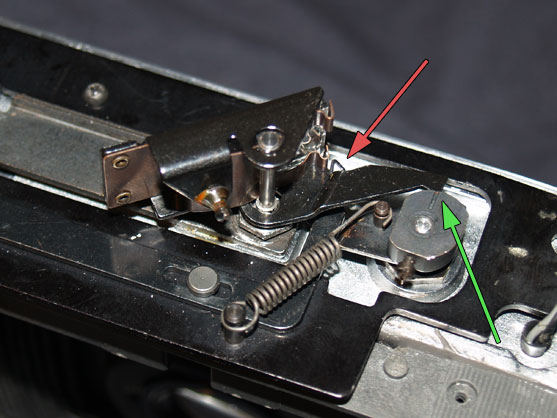
Replace the mirror onto the post and hook the tension wire. Replace cam spring. Swing the mirror counter-clockwise and let it snap back. If it does not, tighten the tension wire with a couple of bends.
Make sure the mirror arm and cam line up with infinity.
Before closing the rangefinder the flash needs to be rewired.
Since removing the rangefinder required the flash wires to be cut, now is the time to put them back. Its only an m-sync, not x-sync hotshoe. So you can only use flashbulbs with it effectively. Though it will trip an electronic x-sync flash, the timing of shutter and flash won't match making any photo dark.
If you have no intention of using flash bulbs, you can certainly skip this step. Making the hotshoe just for show. Now that I think about it, you could also fill the space with bondo and make it like the hotshoe was never there.
I'd like to fix the flash, so grab your soldering iron, flux and solder.
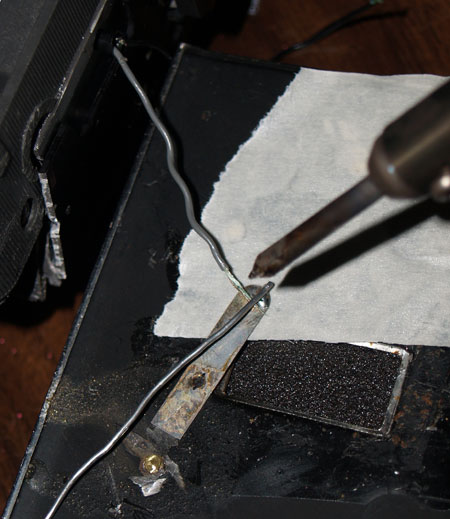
The wires are really crappy, there's barely any wire within the sheathing to even solder properly. Strip them enough to tin with solder.
Solder the plate and white wire.
Once I felt it was solid, I coated the connection with hot glue to keep it stiff.
The next part requires the plastic housing and flash shoe to come together. Take the larger metal hotshoe piece, the plastic spacer, the metal clip and the screw. You can choose to assemble all the parts now, or just the larger metal piece. If you choose to assemble it, place the screw through the housing and into the hole in the white wired plate.

With the copper post sticking through the housing, tin and solder the wire and the post together.
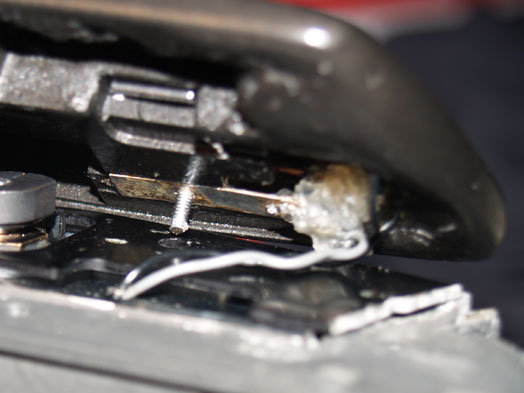
If you haven't already, assemble the hotshoe parts and screw the plate to the housing. Now held tight, you can stuff the wires into the housing and screw it down.
Replace the remaining two rangefinder screws.
One in the front, the other on the left side. The right side, you recall, is gone!
Check the alignment of your rangefinder housing to the camera body. The hot glue and Bondo can create some high spots. If you need to, hack more of the bottom plate to gain a few mm. Hopefully it sits flush.
Oh, and you might as well replace the leather strap too.