The Steps
parts & labor
what's needed to get the job done
basics of function
how does the camera usually operate; what parts do what and go where
the back, the strap, the flash
taking off useless vintage roll-film parts
the rangefinder
removing, taking apart and cleaning
cutter-bar & inner parts
more useless vintage parts that have to go
ready the donor
removal of all nonessential parts from a packfilm donor
hack to pieces
make the back fit
odds n' ends
tidying up; side door
putting it all together
replace rangefinder, fix flash; paint
reset infinity
setting the focus stop
The Rangefinder
In order to keep the amount of cleaning required for this project to a minimum, removing the rangefinder is not only a good idea, its an excellent one. This particular camera I used, though clean on the outside, still had some dirt inside the rangefinder. To clean it, you need to remove the plastic housing with 3 screws. Two on the back and one in the front.
Though it is certainly not necessary at all, removal will make the entire project process just that much more fun educational easier.
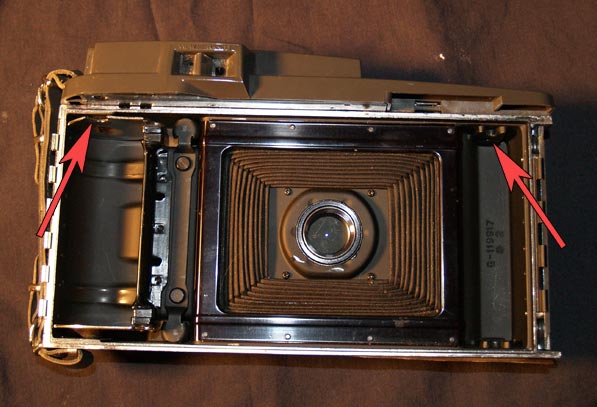
Open the front of the camera to remove the single screw. It will be much simpler if the the front is locked open.
Turning to the back, the left screw is totally easy to see and remove. On the Model 150, the roll-film holder thing even has a fancy notch cut out!
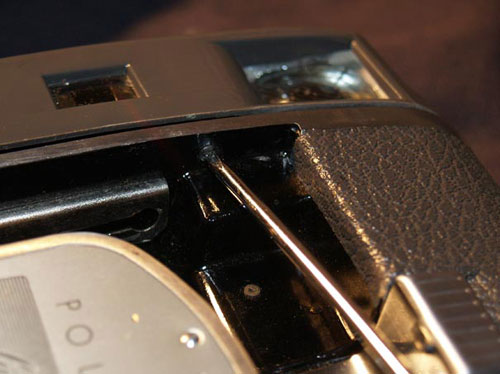
The right side, is a different story. Luckily, some time ago, I had broken my glasses and acquired a Philips screwdriver of tiny size. I thought of bending a nice screwdriver 90 degrees...
Though the right side of the rangefinder and camera body is going to be hacked off later, I like to learn as I go so removing the rangefinder now, makes sense.
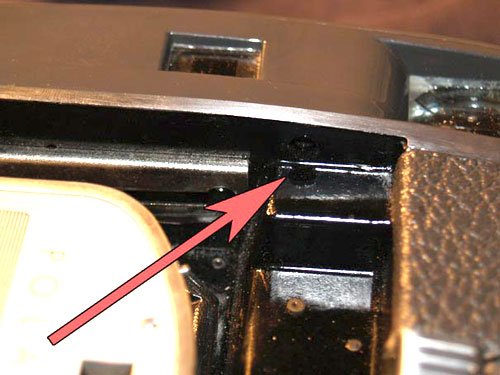
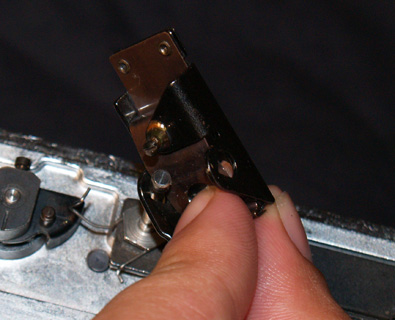
Now, it should be able to do this fancy dance. But wait, you need to be careful of that flash shoe and its wires...
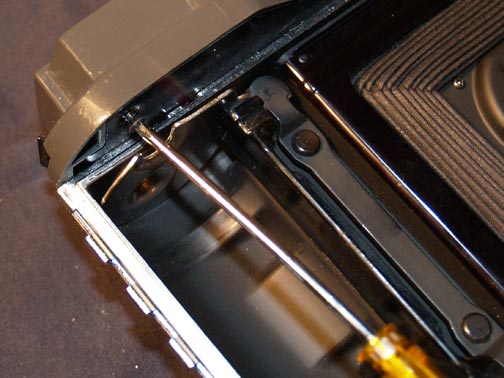
When removing the plastic housing, its all too easy to just yank it without giving a thought to the 2 tiny wires attached with the flash shoe.
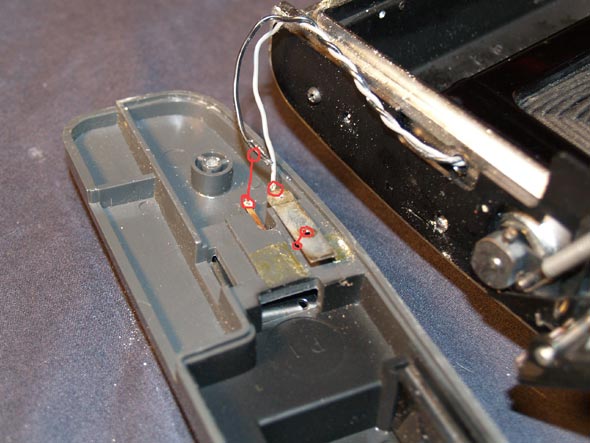
The screw that held the flash and its parts to the rangefinder, also held the strip of metal down through the holes marked.
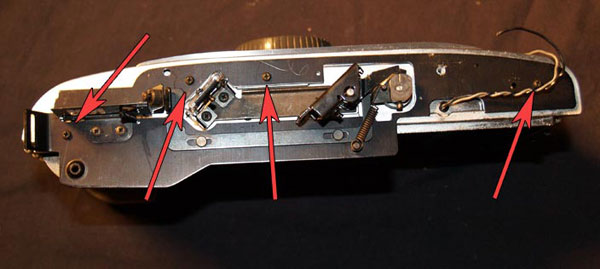
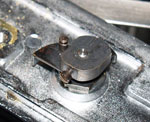
The plastic housing was hiding a pretty complex mess of parts, nothing to sneeze at. There are four screws that hold down the bottom plate. Notice there is a spring attached to the right mirror cam. Unhook it from the plate and cam before trying to remove the plate itself.
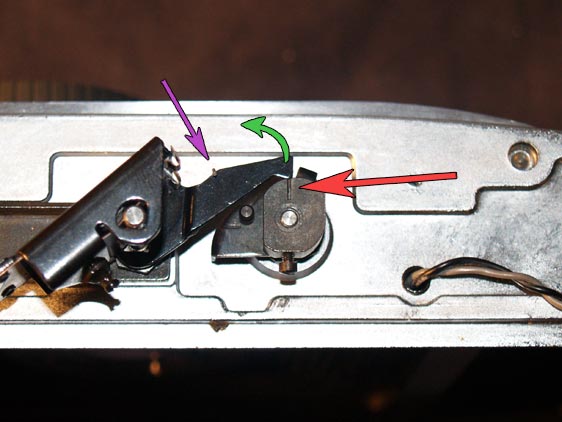
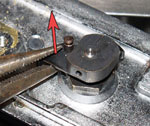
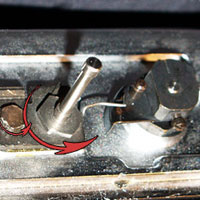
The movements of the rangefinder correspond to the focus knob of the camera. Infinity is marked with a line, red arrow. When the focus knob is at infinity (like when the camera is closed) the mirror arm and this line should meet. As you turn focus from infinity to up-close a small arm turns the cam counter-clockwise. This causes the mirror and its arm to move, green arrow. There is a piece of wire bent around the mirror post and arm, purple arrow. The tension from this wire keeps the mirror arm pressed against the cam. All this equals, well, who cares. Just make sure you know how it works before you take it apart!
I wanted to remove the rest of the rangefinder parts. First to educate, and second to keep things just that much cleaner. The next steps are definitely NOT necessary.
Keeping things clean is my main goal. And if I remove the rest of the rangefinder parts, things will be easier to do in the coming steps.
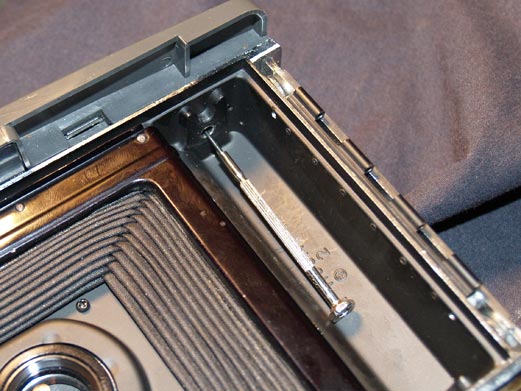
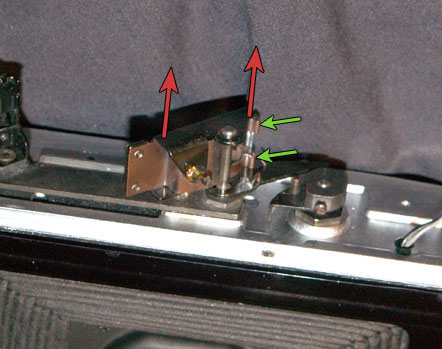
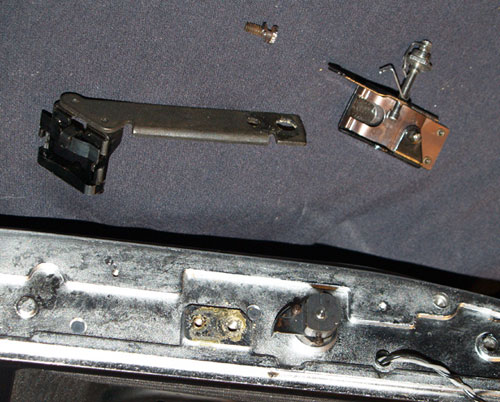
Begin by un-hooking the wire/spring thing from the mirror arm, don't remove it, just let it bend under the arm now. The metal frame and glass is held in place by tension against the post it rotates on. If you press on the curved end, green arrows, you can easily pull the piece straight up, red arrows.
The next logical step is to remove the post itself. Its just needs a quick turn with some pliers, or a wrench if you are so inclined. The tension wire goes between the nut and the metal plate.
And then, of course, the smaller bolt can be removed.
I doesn't matter which order you do it in though.
It should now look like this:
The last part to come off is the focus cam. It is held in place by that single screw. Loosen it a bit, and then with great care not to bend anything, pry the metal arm and cam up and off. Removing the actual post, is not possible without breaking the mechanism.