The Steps
parts & labor
what's needed to get the job done
basics of function
how does the camera usually operate; what parts do what and go where
the back, the strap, the flash
taking off useless vintage roll-film parts
the rangefinder
removing, taking apart and cleaning
cutter-bar & inner parts
more useless vintage parts that have to go
ready the donor
removal of all nonessential parts from a packfilm donor
hack to pieces
make the back fit
odds n' ends
tidying up; side door
putting it all together
replace rangefinder, fix flash; paint
reset infinity
setting the focus stop
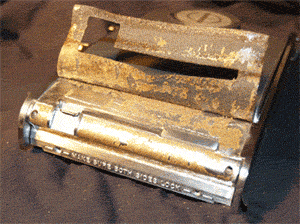
Cutter-bar & Inner Parts
The roll-film this camera took, needed a cutter bar in order to get your print from the camera. I'd say more, but I wouldn't be speaking from actual experience with roll-film.
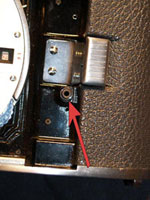
Along the side of the camera there are 4 screws that must be removed. Two of them, are found under the leather covering and must be uncovered.
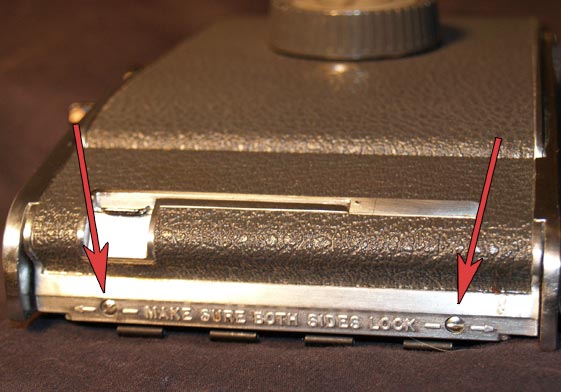
Begin with removing the visible screws.
To get to the other two, pry off the leather. Using a flat screwdriver, fingernails and determination, slowly lift up the leather until you have. Take care not to rip, dent or mar the leather as it will come in handy later, especially if it is in one single piece.
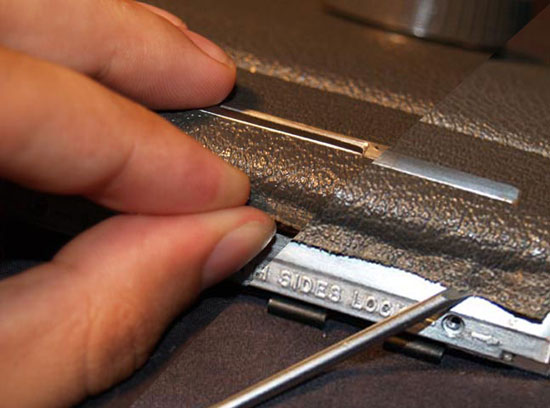
Remove both screws and continue to peel the leather back farther.
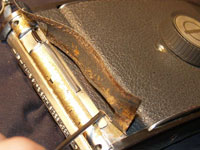
Peel around the edge of the front latch and the rest will come off much easier.
Hopefully the leather is still in one piece. It will be useful in covering the cut we will be making. If yo u don't peel the leather, it will be cut along with the camera.
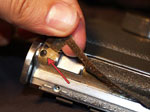
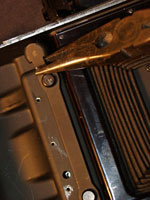
The rest of the cutter bar and the latch lock should come right out.
There are still a few more useless vintage parts that need to be removed.
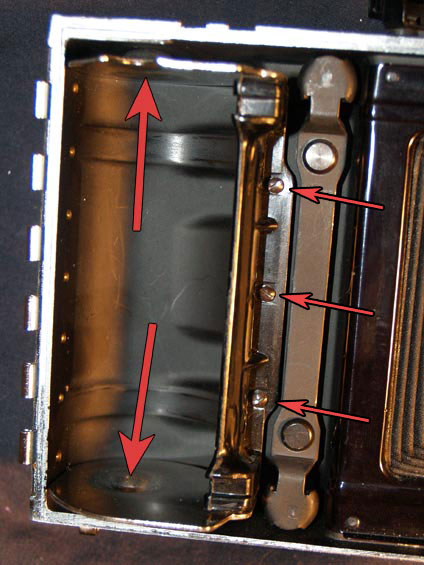
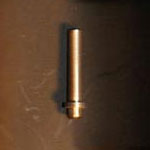
On the left side there is this silly metal thing roll-film spool. It is held in place by two rivets. Fortunately these rivets are put in here so well, they come out with little effort. Originally, I didn't think it would be so easy and actually drilled out the rivets.
Remove the 3 screws that hold it in place, and SAVE them. They will be important later.
Grab some pliers and just yank that sucker from where you think you will be applying the most pressure without denting or scratching anything. Though, the insides can be repainted before this is all over, so scratches might not be that bad. I found it easier to pry the top and bottom one at a time instead of one big ol' yank.
When the holder comes free, a spring and pin should pop out from the hole you should now see that was under the 3 screws.
This was what gave the front its joyful spring-open action.
If you open the front, which just limply falls now, you can see where the pin poked out.
Save these parts, including the roll film holder you just yanked. They will come in useful later.
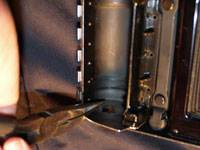
While here, remove the metal clasp that keeps the front closed. It will be one less piece to get metal shavings stuck behind it. Tape the front closed.
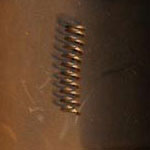
The next part to go is that spring loaded piece of metal. I can guess it was for roll-film, possibly to keep things tight against the film plane, but I really could care less.
Just give it a good bend n' yank at both ends. I kept the springs, they looked so neat and may come in handy one day, for something.