The Steps
parts & labor
what's needed to get the job done
basics of function
how does the camera usually operate; what parts do what and go where
the back, the strap, the flash
taking off useless vintage roll-film parts
the rangefinder
removing, taking apart and cleaning
cutter-bar & inner parts
more useless vintage parts that have to go
ready the donor
removal of all nonessential parts from a packfilm donor
hack to pieces
make the back fit
odds n' ends
tidying up; side door
putting it all together
replace rangefinder, fix flash; paint
reset infinity
setting the focus stop
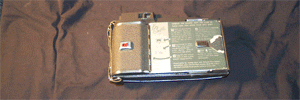
The Back, the Strap, the Flash
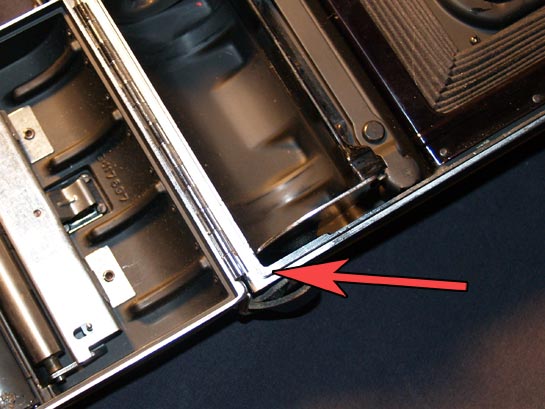
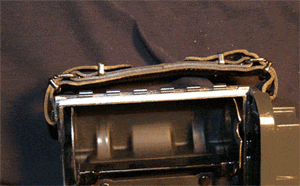
You will, of course, notice that you can't open the back. Thats because it is locked, at the front. Pull down on the metal arm and the back will unlock.
Make sure to set the metal tab on the back to the right, locked position. Otherwise the back door, and not the actual back of the camera, will open.
Now, open the back of the camera. It is hinged on both sides. First it opens to the left with the red button and cutter bar. With that out of the way, the right side can now open, which is the pressure plate and rollers for roll-film. Feel the weight of the 2 halves of the back, when gone this camera will certainly lighten.
Inside you'll most likely find, dirt, rust and maybe even some unused film. Doesn't matter what you find, almost everything you see from the back, is going to be removed.
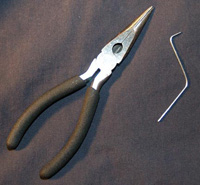
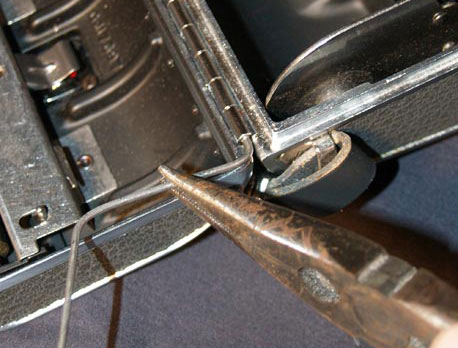
To make the job of removing the back easier, you should grab some needle-nose pliers and a paperclip. The paperclip should be one of the larger sizes so that its diameter closely matches that of the hinge pins. Too large, it won't fit, too small it will bend when you apply pressure. I used a hinge pin from another Polaroid and bent it into shape. What would fit better than the same kind of pin you are trying to remove!?
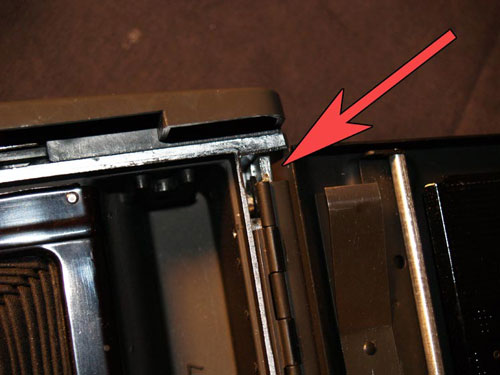
The left side is easiest to remove, so start there first. Grab your pliers and metal poker. Push the poker into the hinge. It may take a little effort, but can be made easier if you can also move the hinge back and forth while you push. Some hinges just have that sweet spot.
Once you have enough of the pin out of the hinge, use the pliers to pull it out the rest of the way.
The right side is a litter harder to remove. Whereas you could use a straight poker with the left side, you can not on the right. The rangefinder is in the way. So you can either remove the rangefinder, which I did not, or you can simply bend your poker as I have.
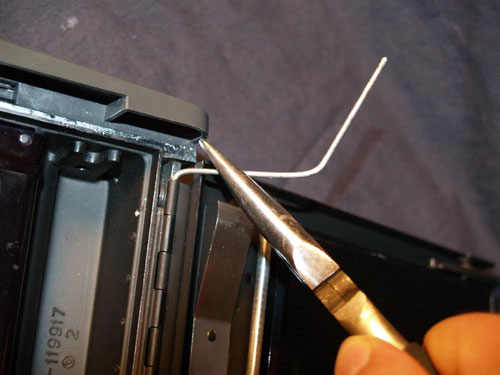
It may be a pain, but this is a more efficient way of removing the right side. Jiggle the hinge to free the pin if it gets stuck.
The leather strap was probably a nice thing to entice buyers when this camera came out. Who doesn't love some old and beaten cow skin? I've seen some that look brand new, and some that crumble in your fingers. Luckily this one is of the former. So to keep it clean, remove it now. A simple buckle system is all that you need to undo.
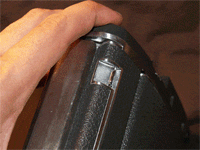
Before getting into directly dealing with the rangefinder, I think its best to begin with the flash hotshoe. It is quite obvious all you need to do is remove the single screw.
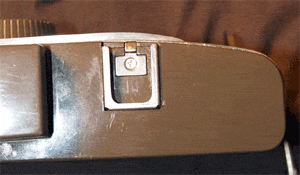
With the screw comes the tiny metal clip, followed by the plastic spacer. Do not try to remove the remaining piece, it is attached by wires within the rangefinder housing. While you can of course yank it out, you will break the already fragile connections and possibly not know how to wire it back together. Thankfully, there are photos on this site!