The Steps
parts & labor
what's needed to get the job done
basics of function
how does the camera usually operate; what parts do what and go where
the back, the strap, the flash
taking off useless vintage roll-film parts
the rangefinder
removing, taking apart and cleaning
cutter-bar & inner parts
more useless vintage parts that have to go
ready the donor
removal of all nonessential parts from a packfilm donor
hack to pieces
make the back fit
odds n' ends
tidying up; side door
putting it all together
replace rangefinder, fix flash; paint
reset infinity
setting the focus stop
Ready the Donor
I found it best to now start taking apart the packfilm camera. Its alot easier to get the cut on the 150 correct without alot of guesswork. The packfilm camera I'm using is an Automatic 104. It only cost a few dollars, so its no biggie if I rip it to shreds. Which is just about what I am going to do.
Almost every single Automatic packfilm Polaroid of this type, function exactly the same. With the exceptions of only a couple of models, they should all be extremely easy to procure. And because each is almost a copy of the next, the procedures following will be similar or exactly the same.
The reason to not simply forget this entire project and use the packfilm camera without all this hacking business, is, well, just look at it for a second. The lens is plastic and has absolutely no manual controls. When you put automation first, and creativity second, you end up with crap. Hence, I am moving ahead.
The easiest piece to remove is the plastic folding front cover. It even has the instructions written on itself. Push, pull, pry, it comes off easily.
Since this is an automatic camera, it has microchips instead of springs and gears. These require actual energy in the form of a battery. And its only par for the course that Polaroid uses an odd shaped and not readily available battery. This one still held power and worked, but who cares.
There is a dent on the battery panel for easy opening.
Remove the battery, 3 screws, the door clip and pull out the plastic battery holder.
Continuing our Symphony of Destruction with the rest of the camera...
Now is a good time to remove the rangefinder. Cheaply locked in place with a single screw.

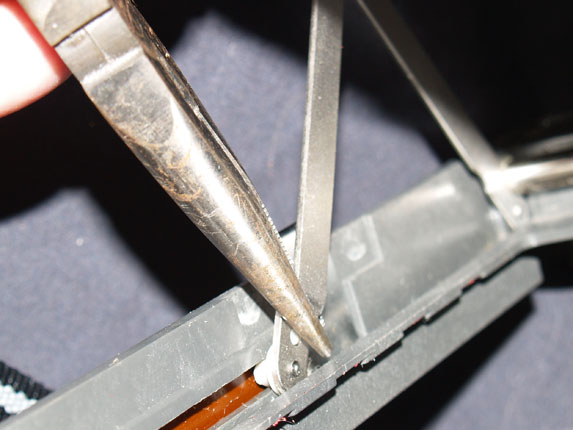
While the back is open, bend all the tabs that hold the bellows to the camera.
Using a flat screwdriver is fine so long as you don't use so much force as to break or scratch the back you are trying to keep.
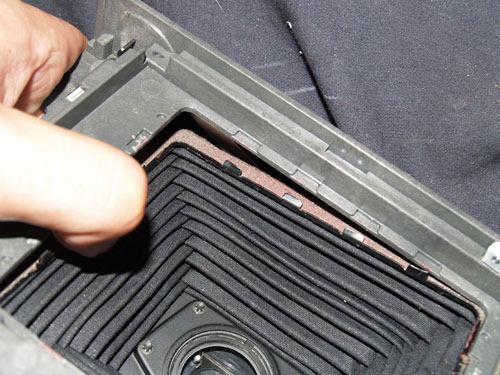
It may stick a bit with the old vintage foam and glue, but you can easily push it out with only bending 3 sides of pins.
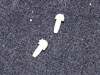
You'll notice the hinge is not exposed like it was on the rollfilm model. The open ends are plugged with what look like playing pieces from the Game of Life. Try not to mark them up too much, they will be useful later, but not necessary. I lost mine before this project was over. Use a hinge pin from the roll-film camera to push out this pin, and save it.
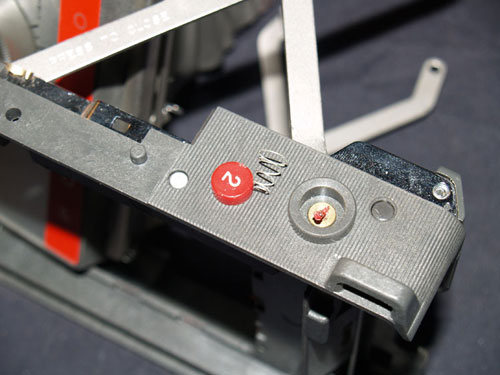
I like the #2 button, but its gotta go. Pry, and a spring will pop out with the end of the button.
Along the bottom, part of the front carriage is held in place with a flimsy plastic tip. Pry that suckah out of there with a quick twist.
The rest of the removal will require more than pliers.
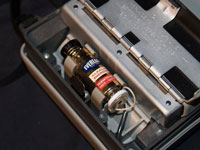
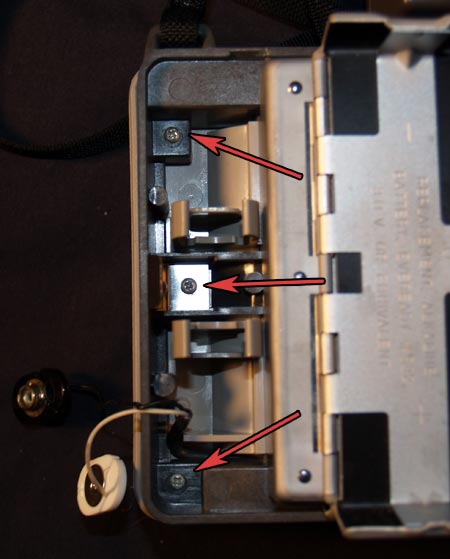
For the last parts of the removal process, something to drill out rivets is needed. I used a Dremel tool with a drill bit. A normal power drill, with a slower speed is probably best though.

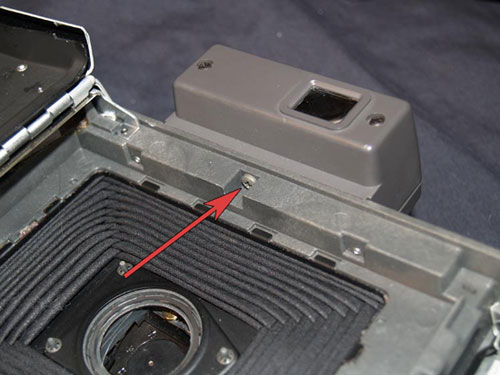
There is a single rivet by the film door release on the bottom
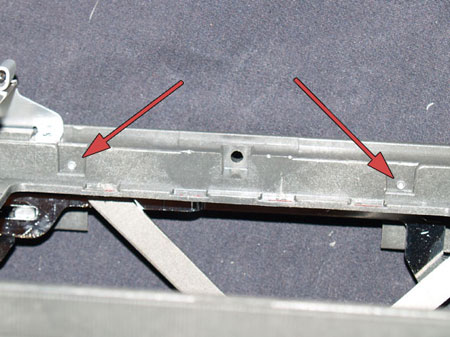
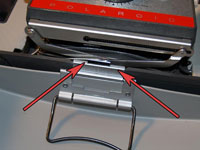
And there are two rivets inside the back towards the top.
Once all the rivets are gone. The bellows and framework should come free.
Now, go get a hacksaw.
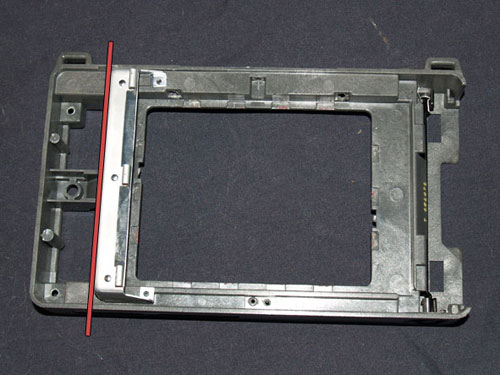
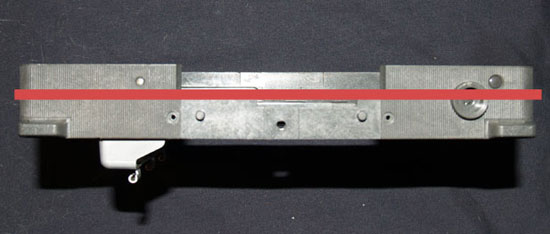
The first and simplest cut is to remove the battery compartment. We are making a super duper mechanical cameras, no need for that "witchcraft". Cut along the red line, using the metal as a guide.
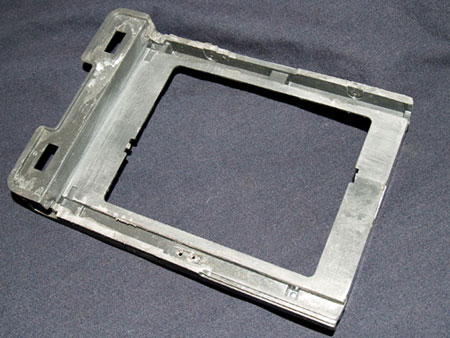
This part is most important. Looking down at the back, you will see the film plane. You need to cut off the edges and bring them either flush with or lower than the film plane.
No reason for it to look great, only functional. As long as the film plane is utterly flat and the latch works, its all good. I chose to sand off the rough edges, and give the back a cleaner look.
I did not with this project, but feel free to paint this piece before it is attached.
Finally, a ready to use Polaroid pack-film back.