The two thin metal ridges that run along the top and bottom of the camera prevent the film back from sitting flush. You have a few choices. You can grind one of the ridges off or file the edge of the film back to fit.
I chose to grind the top ridge off. Because eventually the original left back door will be replaced, you need to figure out how far back you should cut.
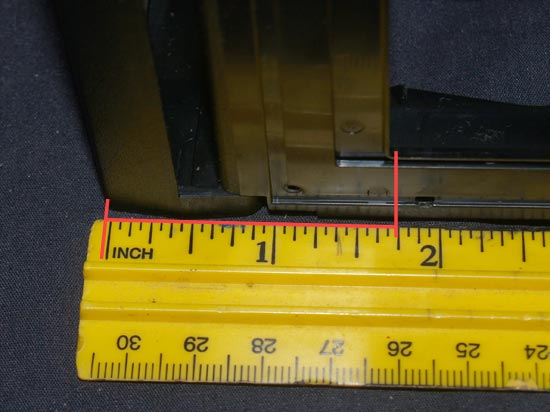
open back flat, measure; ~1.75 inches
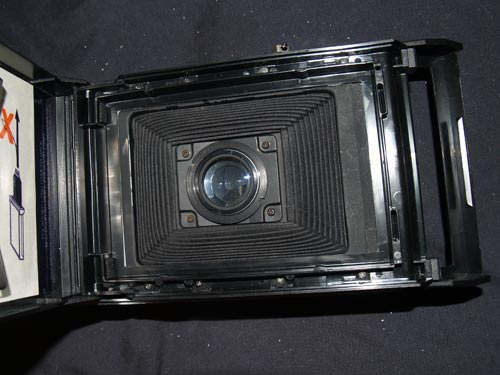
With an empty film pack still inside, open the film door so that it is flush with the film plane.
Measure this width.
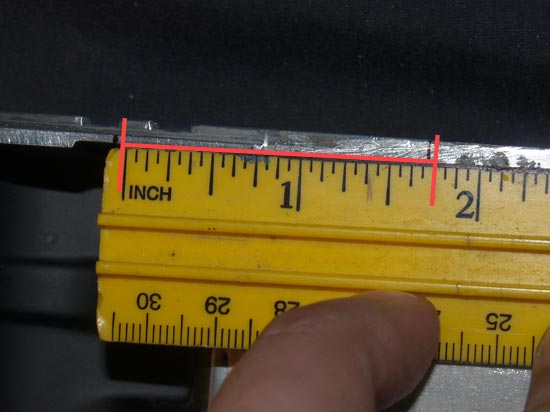
measure from edge to left
Measure from the left edge of the film plane to where you will end your ridge cut.
Grind or cut off the ridge to this newly measured point.
While you are at it, the 160 has some extra metal sticking up around the film plane, grind those flat as well.
Try not to grind off the 8 rivets.
Now you may place the film back onto the camera body.
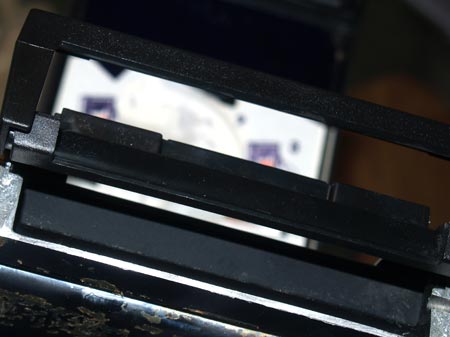
With a film pack still in, line up the camera body film gate with the film mask’s edges.
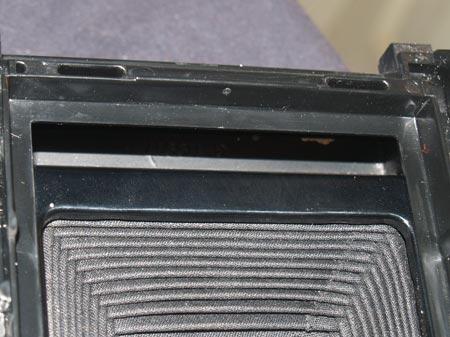
gap: top view
gap: bottom view
Remove the film mask from the back, and notice that on the right side there is a gap typically covered by the film mask.
You need to get this light tight.

rough edge to be filled
Bondo-ed, sanded and flush
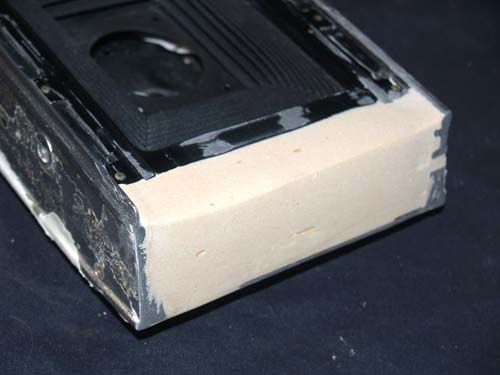
I chose to use Bondo to fill in this edge.
This extended the edge to cover that gap.
Another choice is to cover and seal this edge with a piece of metal plate.
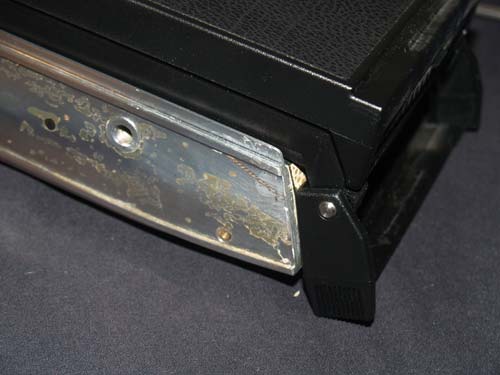
Check angle by opening clasp
Check the angle of the cut and your Bondo by opening the clasp and making sure it doesn’t hit anywhere
Bondo is nice, but it certainly doesn’t hold much aesthetic appeal. So it would be best to cover it.
If the film back was attached before re-leathering this edge, it would be hard to get it under the film back.
So lets get a jump on the re-leathering process now.
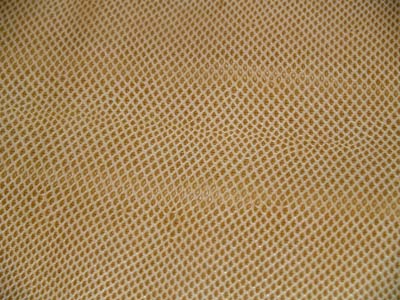
closeup of snake skin pattern
I found some lovely, tight-scaled, snake skin in a nice cream color.
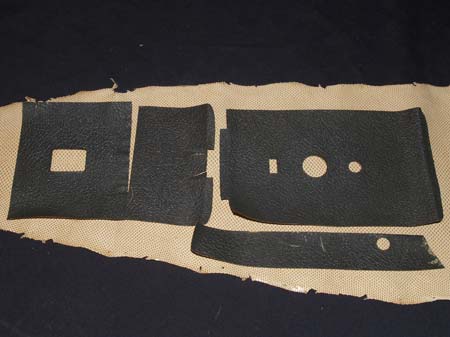
layout the leather pieces
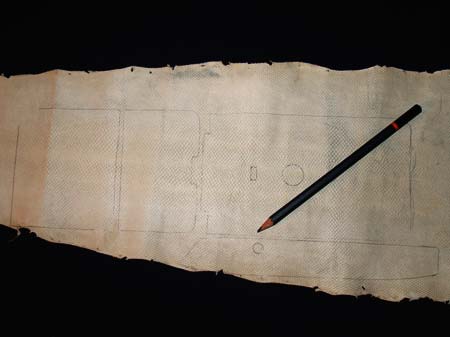
use pencil to outline
Layout the original leather so that the scales are all lined up when applied to the camera.
Since the Bondo edge and the yet to be made left-side back door are similar in shape I used only one template and made two pieces which I will trim to fit.
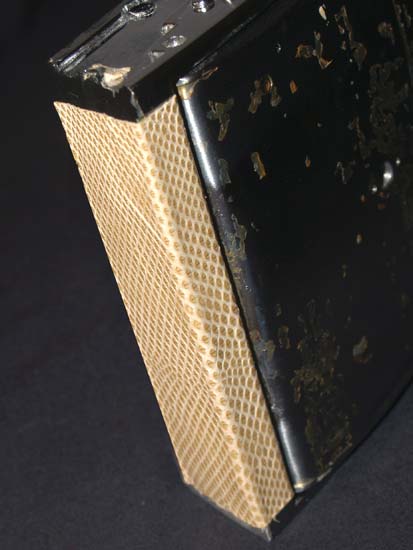
covered and smoothed
Make sure that there is enough leather to go underneath the film back, you don’t want to see an ugly leather edge.
I used contact cement to glue the leather.
Follow the directions on your glue of choice.
You can take this time to also cover the front door and bottom with the leather you’ve cut.Or you can do this whenever you feel like it.
With the ugly edge covered, it is time to attach the back to the body.
If you haven’t already, remove the rollers from the film back. The added weight will not make this next part easy.
Double sided tape will make a great temporary attachment to the camera body.
You do not need to use double sided tape, but it will make attaching the back less of a hassle.
Try to find stuff that is labeled “heavy duty” and isn’t the kind you can remove again.
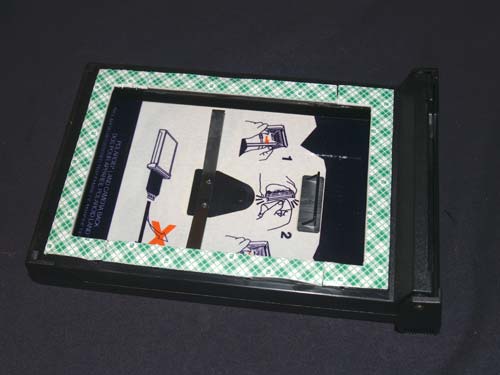 I cut strips to fit against the film opening and the small groove of the screw mounting holes. It would be too much to have the tape go all the way to the outer edges.
I also slightly beveled the edge touching the film plane to make sure it didn’t block anything.
Make sure you have a film pack mask inserted and open the film back so you can line the film gate with the camera body’s. Use the remaining bottom ridge to keep the back straight. You only get one shot with this tape, so make sure you have a mark made where you wish to place the back that you can line up with once you remove the tape backing. Press hard, the tape will do the rest.
drill 8 holes for 8 screws
Grab yourself a drill and a bit that is slightly smaller than the screws you are using to attach the back.
Use torque to get the back firmly against the body.
With the back completely attached its time to get your hands on a single window finder.