Since having the focus knob on the front of the camera say “Model 160” wouldn’t look good with a 110A, it would be a good idea to swap them.
So, do the following step to both camera bodies.

remove the knob
Pull the focus rail out of the way and tape it to keep it from falling back.
Keep the plastic washers, blue arrows, and remove the focus knob, red arrow.
You can also remove the metal tab by lifting the metal spring, green arrows, and sliding it out the grooves.
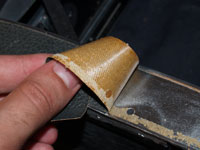
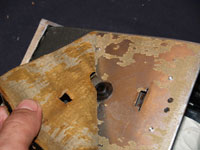 Peel the leather off the front door, don’t worry about any glue left, you can scrape it off with a razorblade.
If you don’t have any other original leather pieces to use as templates, BE CAREFUL when peeling.
A tear or stretch can make cutting new leather difficult.
 Remove the strip along the bottom.
If you haven’t already, remove the small piece of leather by the front latch as well.
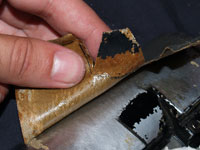 To remove the front leather, unscrew the front latch button.
There are a couple of edges and cuts to mind with this piece of leather when peeling.
Now that the camera body is basically clean. It is time to get dirty.
To get a pack film back to fit a number of things must be done to the camera body. The side must be cut to allow the overhang and clasp.
measure from edge to end; ~5 inches
Place an empty film pack into the holder. This now gives you the actual location of the edges of the film.
This now tells you where the beginning of the cut must be.
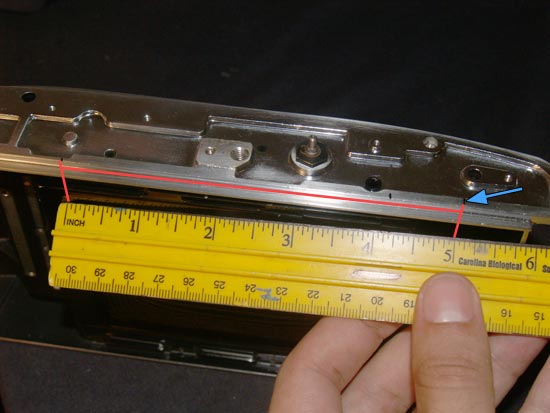
measure from edge to end; ~5 inches; mark: blue arrow
From the left edge of the film plane, measure out the distance to the end of the film back. In this case it is 5 inches.
Mark the point, blue arrow, where you will begin the cut.
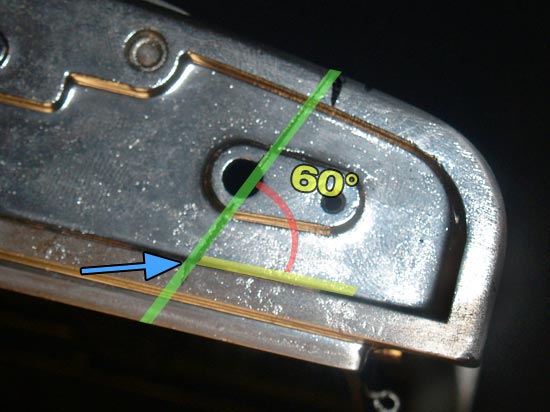
use beginning mark, blue arrow; mark miter cut, green arrow
With this beginning mark you can now draw the cut.
It can be a straight line, but a miter cut would look much cleaner as it matches the film back’s angled edge.
I found 60 degrees to be a nice round number.
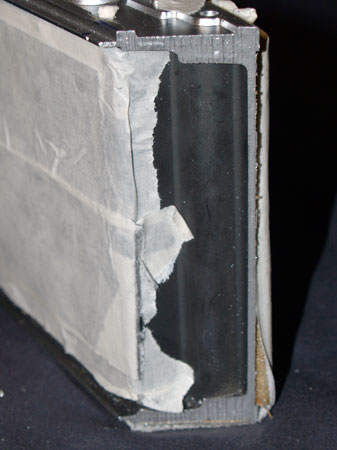
finished
Bust out your hacksaw, or, if you are fancy, a bandsaw, and cut it as straight as possible. You can file/sand it later if you mess up.
To keep things clean you can mask off places, like the bellows, with some tape.
It should now look like something like this.