This camera is very old. Depending on the condition yours is in, it may need a thorough cleaning. This one was decent enough to be cleaned as I worked on it. Since 80% of the back is going to be removed, it doesn’t have to look that great.
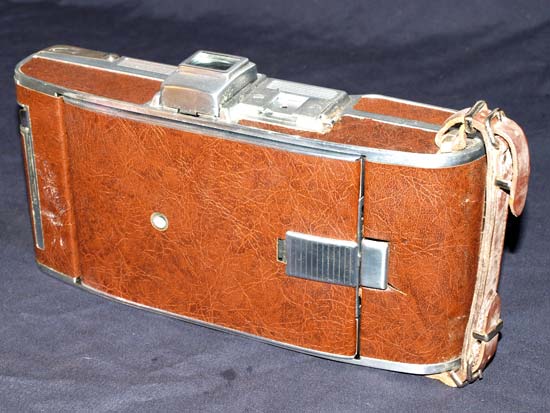
front of Model 95b; fake leather covering; tripod socket
The best part about this model is that there is no focus knob to obscure the tripod socket on the front. Almost all the other roll film cameras require a spacer to use this socket.
The fake leather covering is really nice looking.
I don’t know why Polaroid switched to an ugly off green real leather covering later.
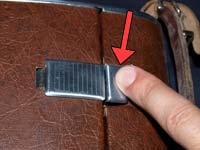
To open the camera from the front, press the little button. A spring and pin will pop the focus rails out enough for you to now unfold it.
As you unfold it, you will hear and feel an obvious click as the front locks into place. It will NOT move again, these cameras are built like tanks and this is an obvious place to take notice.
There is no way you can, after it locks, close the front without knowing the way to close it. I think this is a good thing, as you can use the front to attach a tripod and any movement would be quite unwelcome.
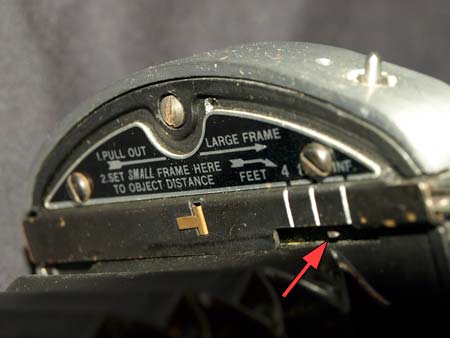
pull out and it will lock
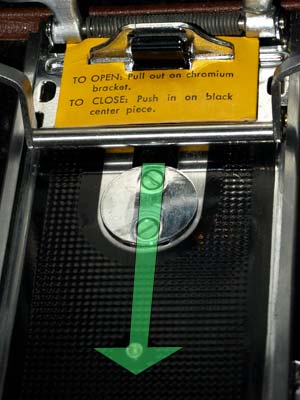
Once opened you can now extend the lensboard and bellows. Luckily mine came with this written on a tiny yellow paper.
When you pull the bracket out far enough it locks into the stop.
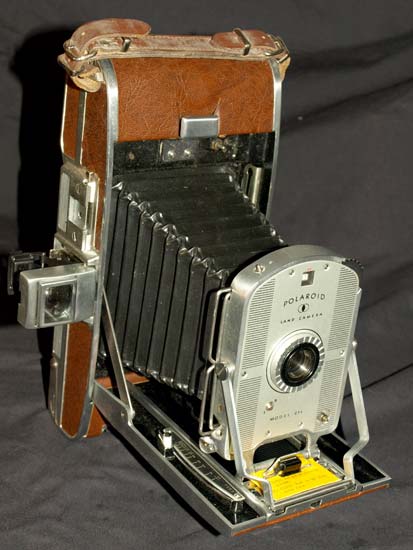
opened and ready to shoot
When the camera is opened and ready to go, there are still a few more steps before you can take a picture.
You can use the small metal tab by the tripod socket to hold the camera parallel to the surface it is on.
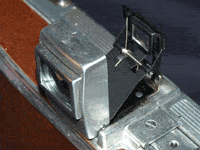
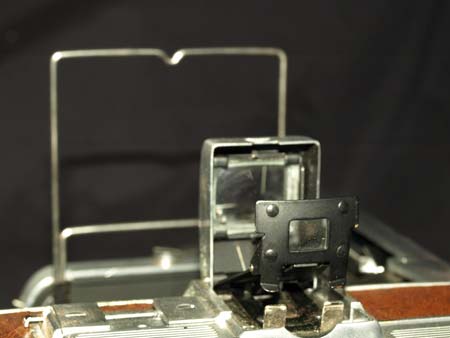
These models have a flip up viewfinder.
This has no focusing capabilities and no parallax correction.
Before you can try parallax correction, you need to know the distance to your subject
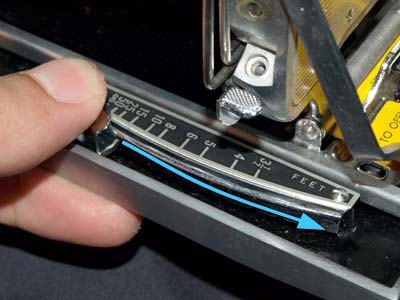
use distance estimation to move lensboard into focus
Since I do not have a rangefinder on the 95b, I have to guess the distance.
Press the button and slide the lever to the right judged distance.
This moves the lensboard back and forth.
pull out first wire frame all the way, pull second wire to distance
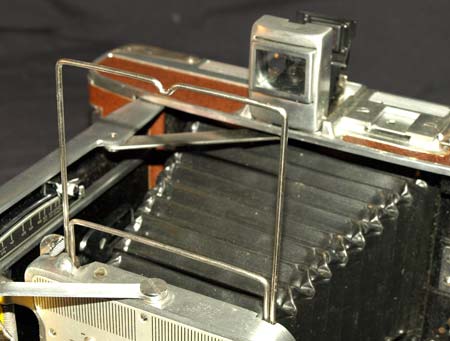
wire frames out and set
For parallax correction this camera uses wire frames which you must set to the correct place by the distance estimation.
On the top and back of the lensboard is a small note and marks.
Pull out the first wire all the way. Then, using your distance estimation, set the smaller second wire to the right position according to the instructions written.
through the finder and onto the frames
Looking through the viewfinder and and wire frames is still somewhat of a crap shoot in terms of true framing.
So always give yourself plenty of room for important subjects on all sides of the frame.
Not truly practical in today’s world but certainly a retro vintage thing, wire frames and pop up finders are really something you have to try.