Of all the finders on pack film cameras, the Zeiss-Ikon finder is the best. The metal construction and superb glass makes focusing and composing much easier. Your other finder possibilities are the double window for focus/composition or the single window “distance estimator”.
Whatever finder you have, it probably needs a good cleaning. Depending on which kind of finder you have, the removal may not be necessary or even possible. However, each finder can be opened and cleaned. If you can remove it, it makes cleaning it and the camera alot easier.
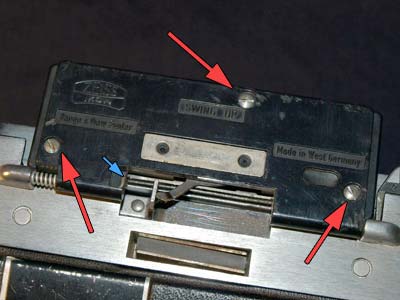
finder screws; remove finder pin: blue arrow
The finder folds down and is held in place with a magnet. To remove the entire finder assembly, you need to carefully pull the pin, blue arrow. To simply clean the finder, you only need to remove the 3 screws, red arrows.
 The outer shell is held in place by two screws on either side.
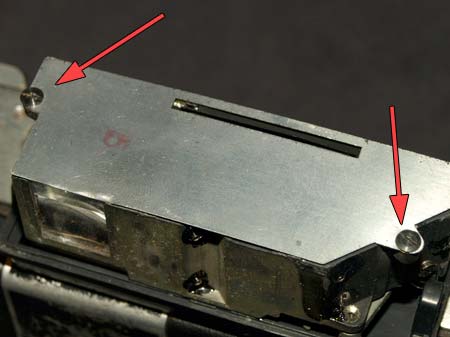
remove 2 screws and peek inside
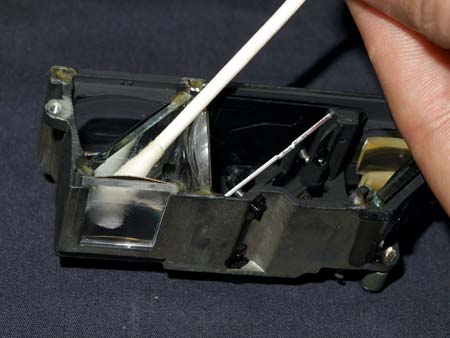
Sliding off the shell, and removing the assembly from the plastic bottom, you can now remove the little cover.
clean all surfaces
Do not try to remove any of the glass if you are not prepared to remember how it all goes together.
You can clean all the surfaces you can touch with a swab and some lens cleaning solution, or good ol’ rubbing alcohol if you wish.
You will notice the odd configuration of the finder. The 2 mirrors work the focusing aid, and the center cube is the parallax frame.
Clean until you can’t clean anymore. The glass is pretty nice so most likely once done, it should be really bright and clear.
Reassemble the finder and put it back on the camera body. Or, leave it aside until you finish cleaning the rest of the camera.